Sync Google Drive Files to Snowflake

Got files sitting in Google Drive that you need in Snowflake? Whether they are CSVs, Excel workbooks, TSVs, or Google Sheets, Supaflow's Google Drive connector can sync them into Snowflake tables automatically -- with schema discovery, incremental sync, and schema evolution built in.
This guide walks through the full setup end to end using CSV files, but the same workflow applies to all supported file types.
What the Google Drive Connector Does
The Google Drive connector reads structured data from a Drive folder and loads it into your destination. It supports four file types:
| File Type | How Tables are Created | Scan Depth |
|---|---|---|
| CSV | Each folder becomes a table; all CSVs in a folder are combined as rows | Root + one level of subfolders |
| TSV | Same as CSV (tab-delimited) | Root + one level of subfolders |
Excel (.xlsx) | Each worksheet becomes a table (named <file>_<sheet>) | Recursive through all subfolders |
| Google Sheets | Each worksheet becomes a table (named <file>_<sheet>) | Recursive through all subfolders |
For CSV and TSV, files within the same folder can even have slightly different columns -- Supaflow unions them and fills missing values with null. For Excel and Google Sheets, each non-empty worksheet with a header row becomes its own table.
Every row includes two system fields (_supa_file_name and _supa_file_id) so you can always trace data back to its source file.
Incremental sync is supported out of the box. After the initial full sync, subsequent runs only pick up files that have been modified since the last run -- no re-processing the entire folder each time.
Prerequisites
- A Supaflow account (sign up here)
- A Google Drive folder with data files (CSV, TSV, Excel, or Google Sheets) -- see the Google Drive source docs for full setup details
- A Snowflake account with a warehouse, database, and schema ready to receive data -- see the Snowflake destination docs for connection options
Step 1: Prepare Your Data in Google Drive
Create a folder structure in Google Drive for Supaflow to discover. For CSV and TSV files, each folder becomes a table. For Excel and Google Sheets, each worksheet becomes a table.
For this walkthrough, we will use CSV files. Create a folder called accounts and add a file called account1.csv with content like this:
Name,NumEmp,Industry
Company A,25,Heavy Industry
Company B,36,Mining
Company C,47,Aerospace
Company D,58,Fiber Optics
You can add as many folders and files as you need. Supaflow discovers them all automatically. If you have Excel or Google Sheets files instead, the same workflow applies -- just select the matching file type when creating the source.
Step 2: Create a Snowflake Destination
Before creating a pipeline, you need to configure where the data will land. Go to the Destinations page in Supaflow.

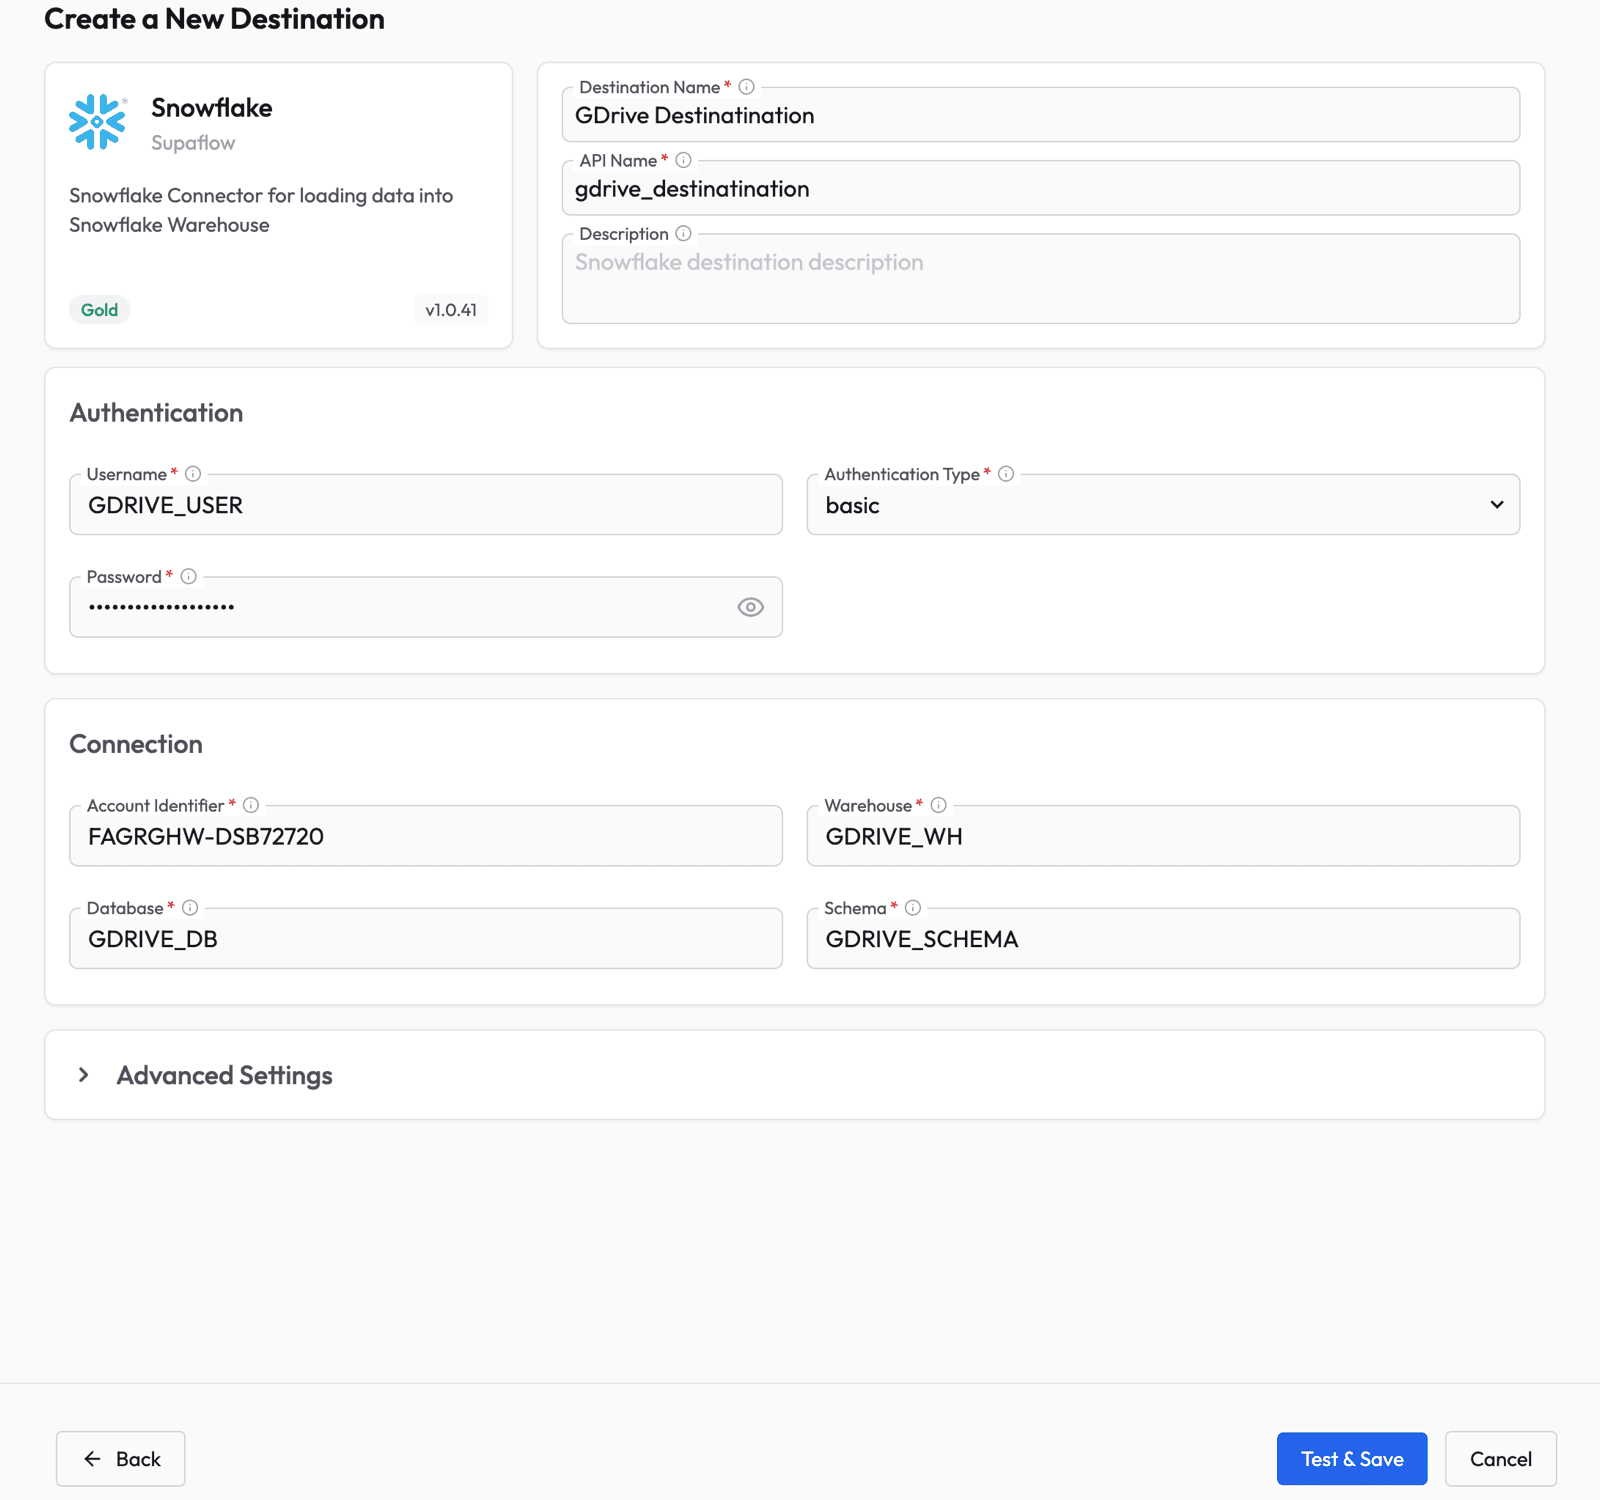
Click Create Destination and select Snowflake. Fill in your Snowflake connection details:
- Authentication Type -- select basic from the dropdown first
- Username and Password -- your Snowflake credentials
- Account Identifier -- your Snowflake account URL (e.g.,
XXXXXXX-YYYYYYY.snowflakecomputing.com) - Warehouse, Database, and Schema -- where the data will be loaded
Click Test & Save to verify the connection.
Step 3: Create a Google Drive Source
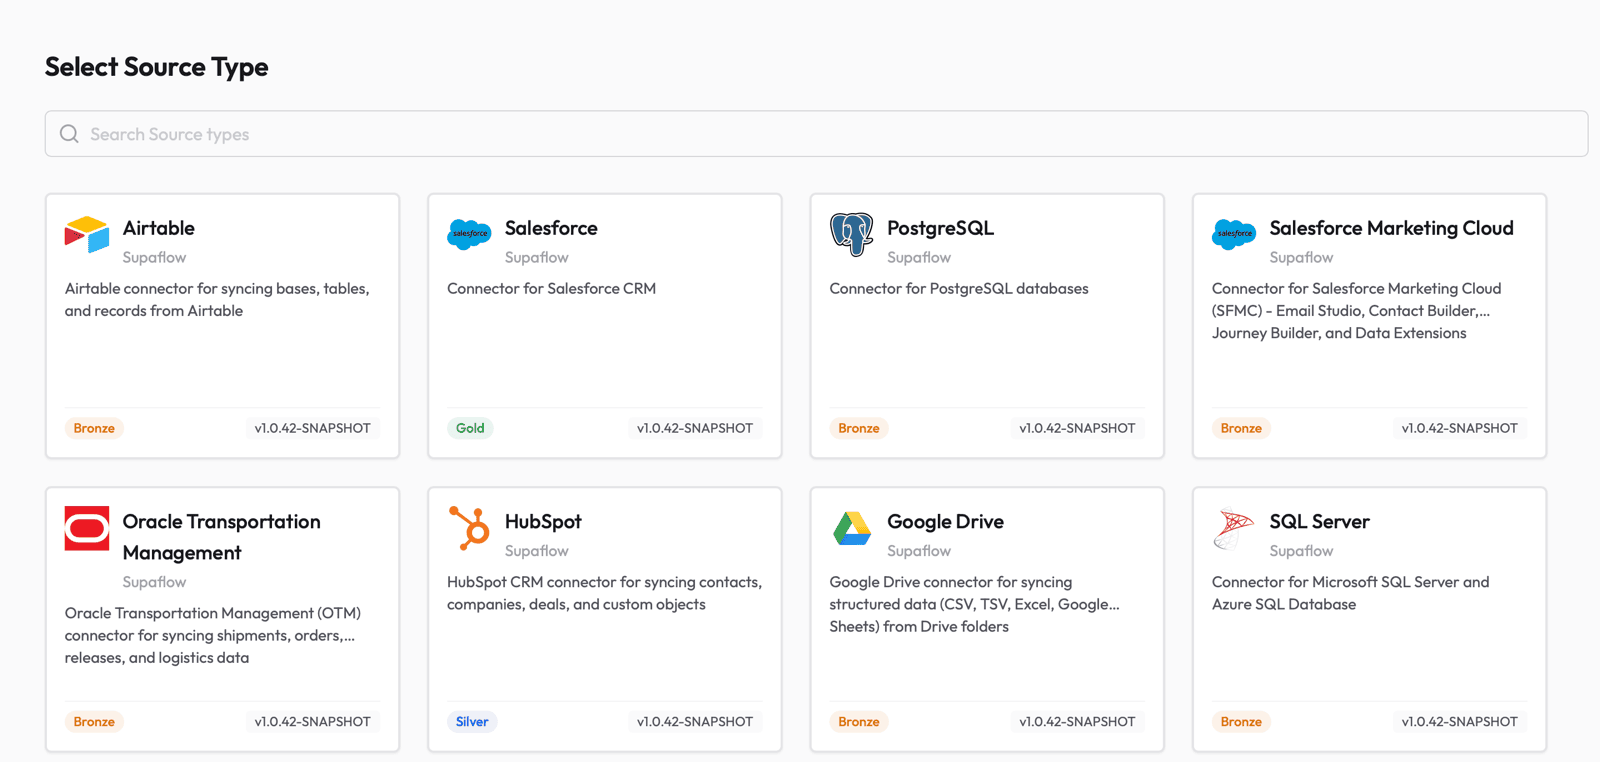
Next, set up the Google Drive source so Supaflow can read your files. Go to the Sources page and click Create Source. Select Google Drive from the list of available source types.
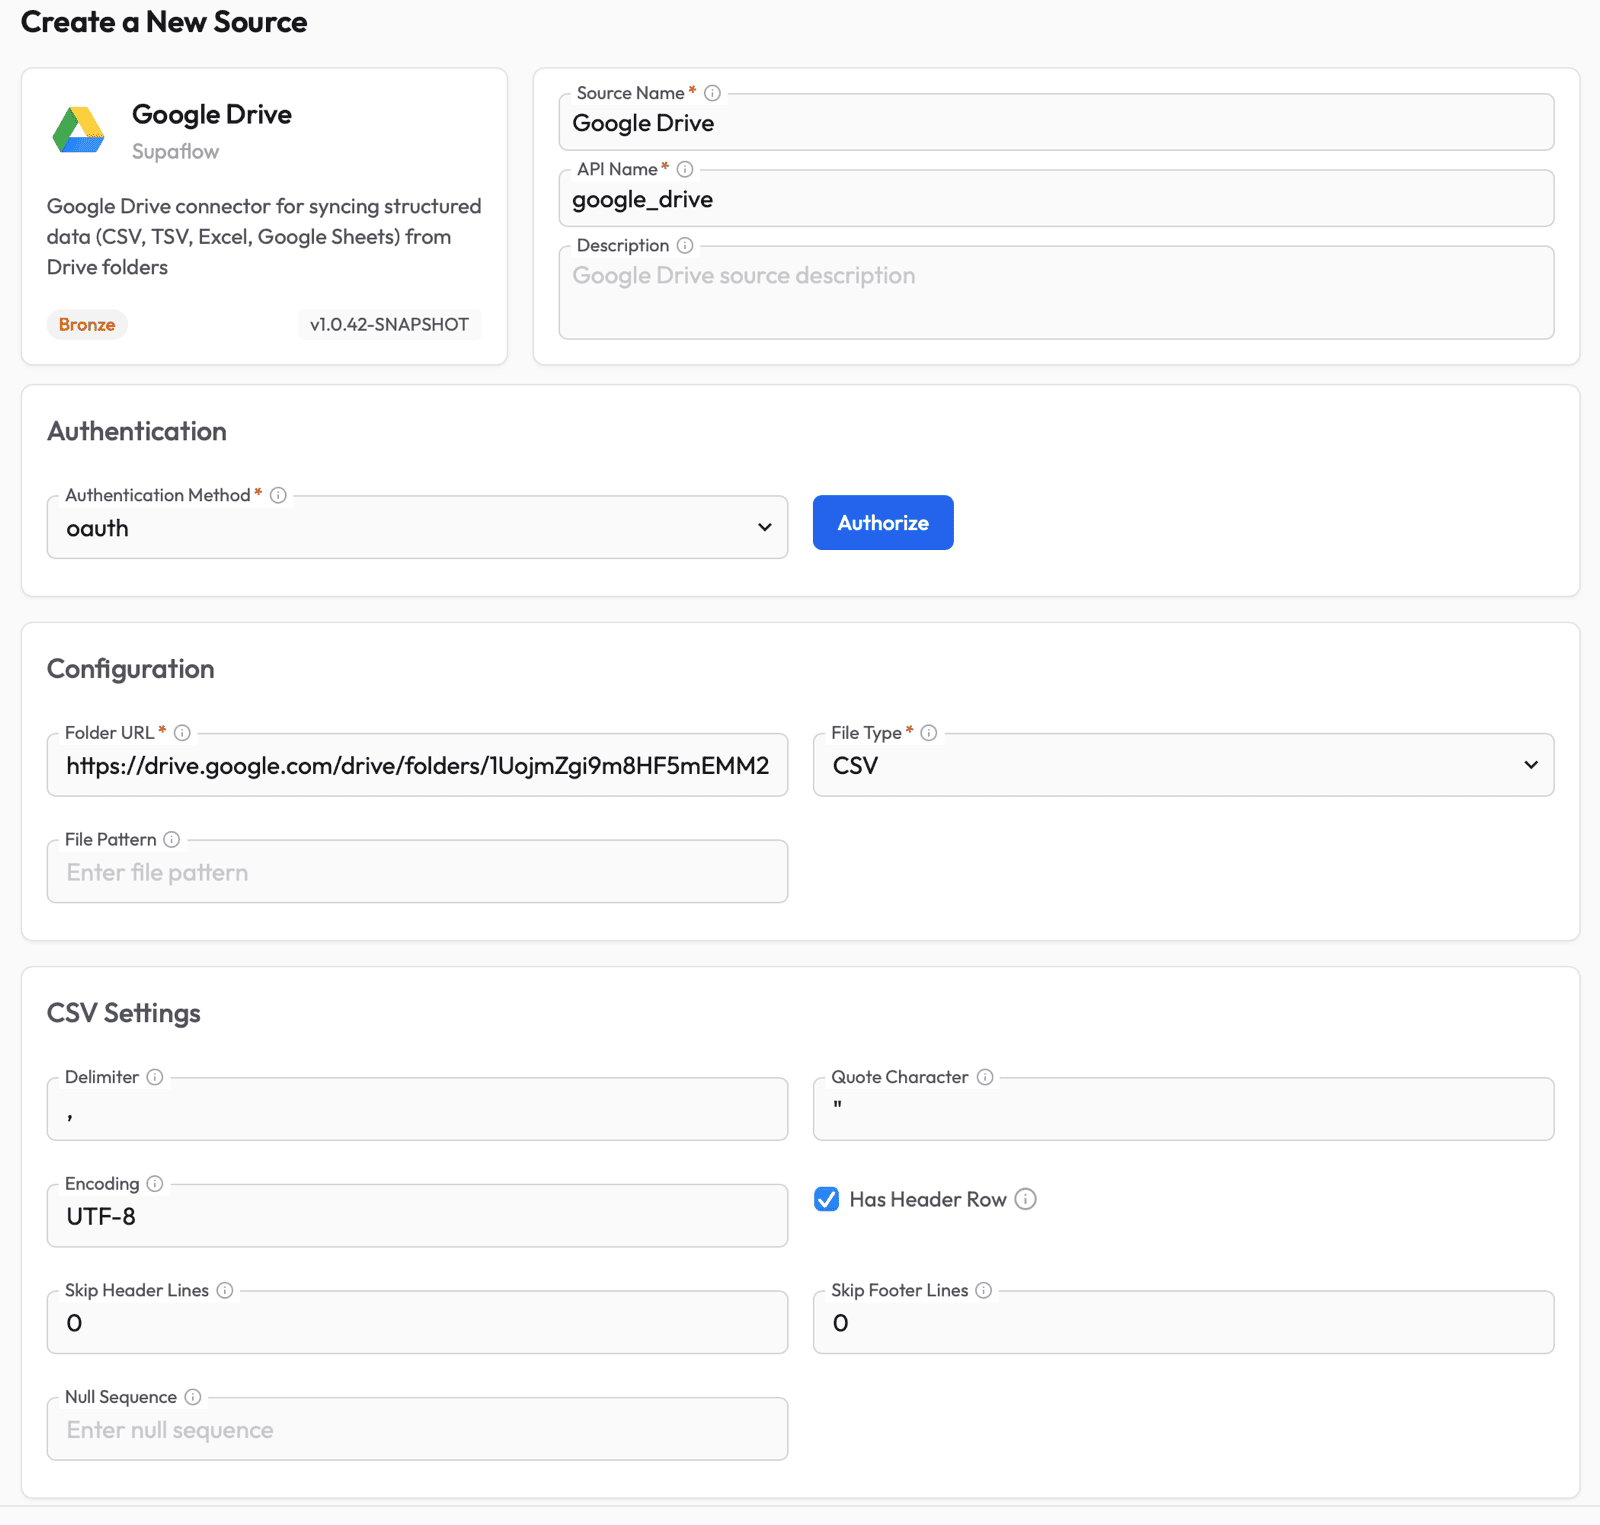
Fill in the source configuration:
- Source Name -- give it a descriptive name (e.g., "Google Drive")
- Authentication Method -- select oauth and click Authorize to sign in with your Google account and grant Supaflow read access to your Drive
- Folder URL -- paste the full URL of the Google Drive folder you want to sync (e.g.,
https://drive.google.com/drive/folders/...) - File Type -- select the format of your files: CSV, TSV, EXCEL, or GOOGLE_SHEETS
- CSV/TSV Settings (shown when CSV or TSV is selected) -- configure delimiter, quote character, encoding, and whether the file has a header row. The defaults work for most standard files.
- File Pattern (optional) -- a glob pattern to filter files by name (e.g.,
sales_*.csv). Leave empty to include all matching files.
Click Test & Save to verify the connection. Supaflow will confirm it can access the folder and read files.
For the full list of supported file types and configuration options, see the Google Drive source docs.
Step 4: Open Your Project
Navigate to your project that has the Google Drive source configured. Click Open to enter the project.

Step 5: Create a Pipeline
Inside the project, click Create Pipeline to launch the pipeline wizard.

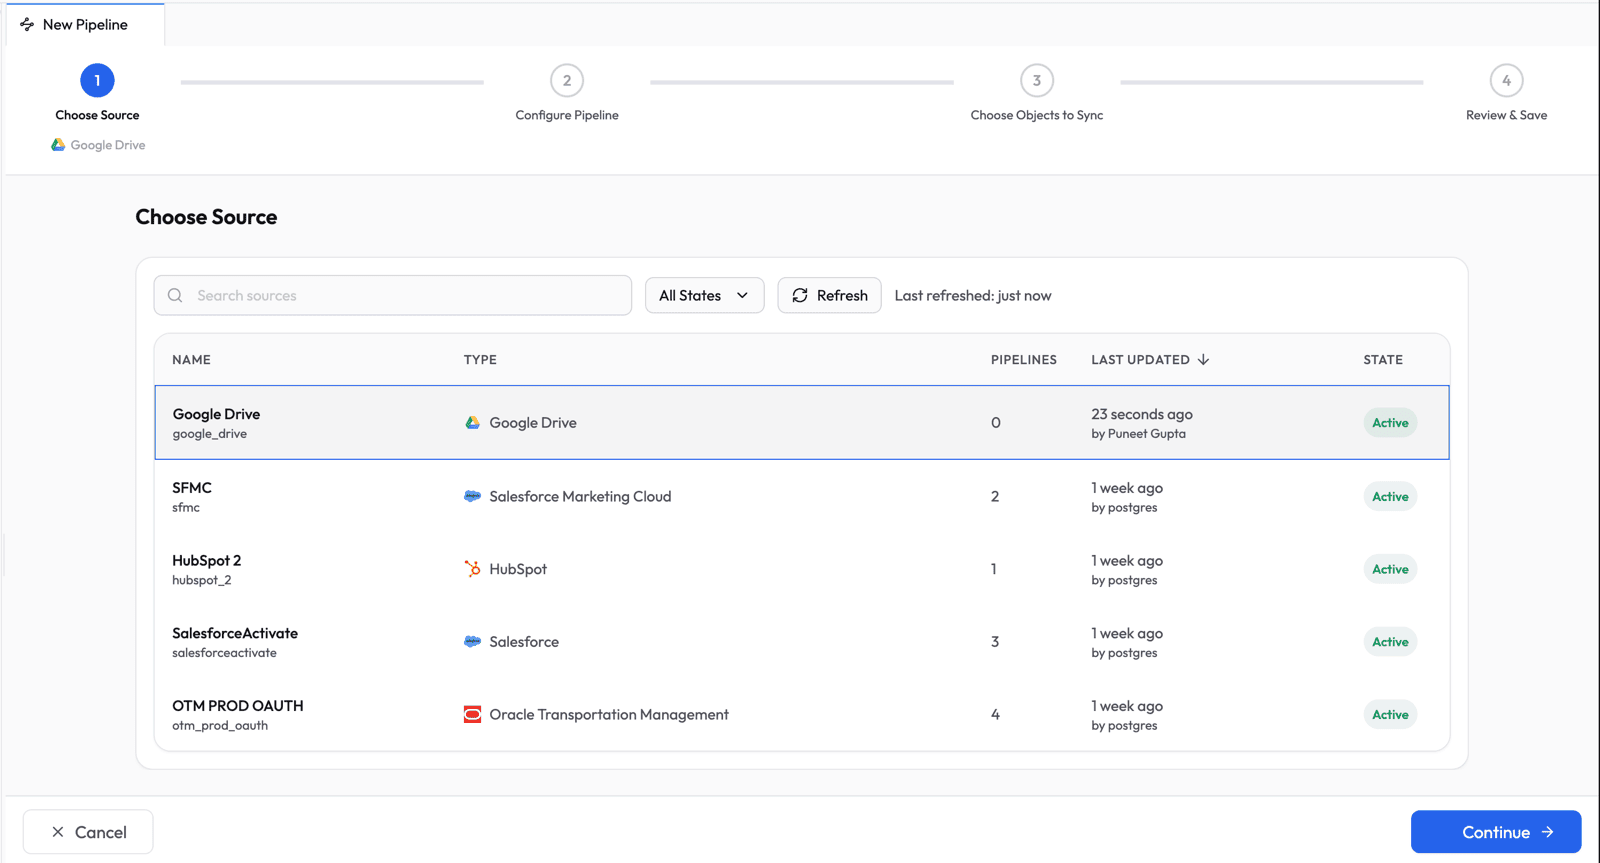
Choose Source
Select Google Drive from the list of available sources and click Continue.
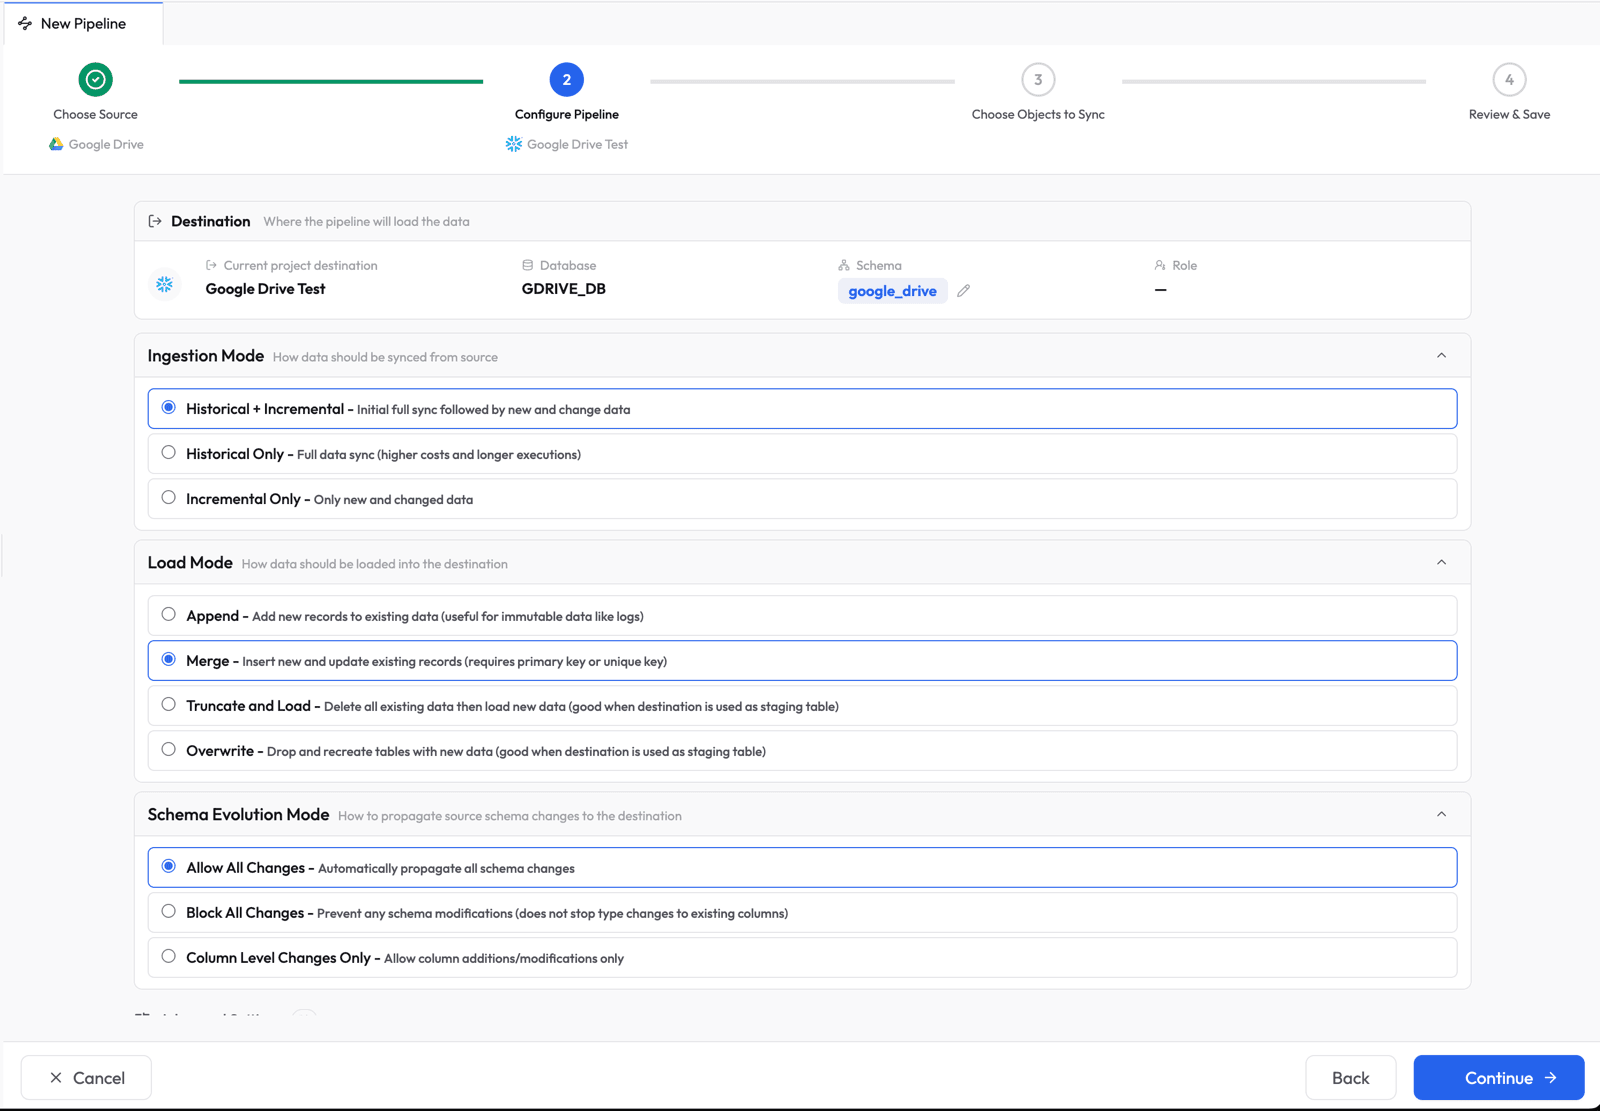
Configure Pipeline Settings
Set the sync behavior for your pipeline:
- Ingestion Mode: Historical + Incremental -- does a full sync on the first run, then only picks up changes on subsequent runs
- Load Mode: Merge -- inserts new records and updates existing ones based on primary key
- Schema Evolution Mode: Allow All Changes -- automatically propagates column additions and type changes to Snowflake
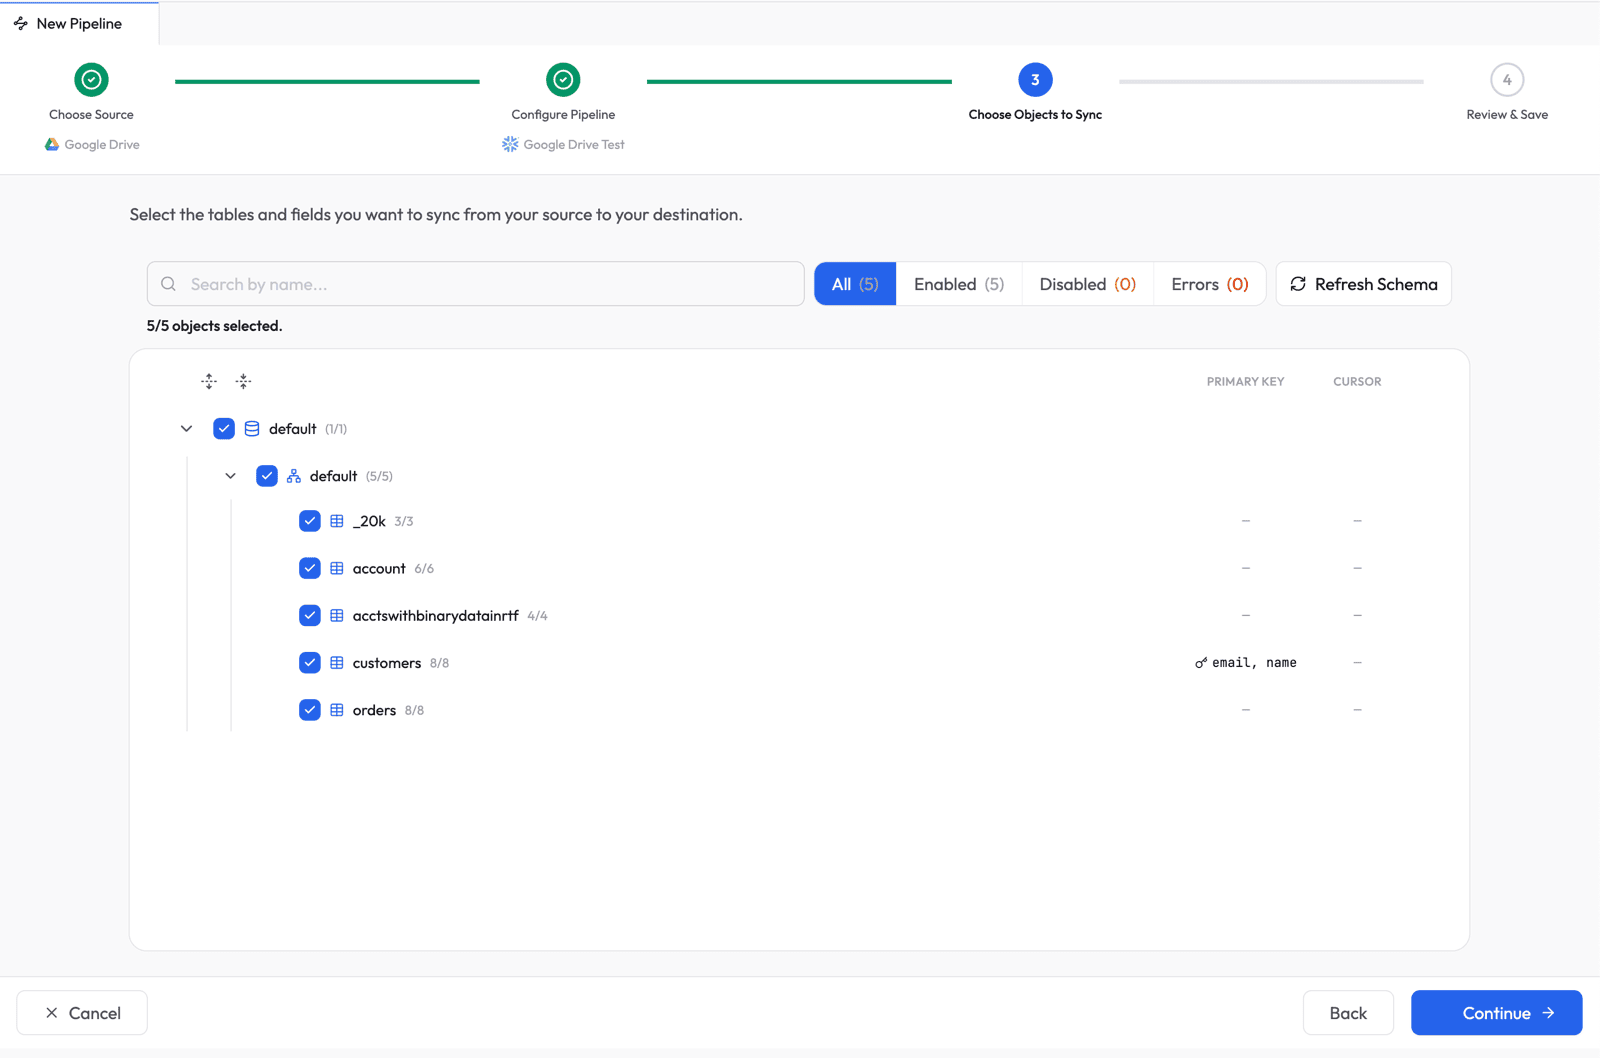
Choose Objects to Sync
Select which tables (folders) and fields (columns) to sync. Supaflow auto-discovers your Google Drive folder structure and shows all available objects.
Tip: If you recently added a folder to Google Drive and it does not appear in the list, click Refresh Schema in the top-right corner. Supaflow will re-scan your Google Drive and pick up changes. Note that for CSV/TSV, Supaflow scans the root folder and its immediate child folders (one level deep). For Excel and Google Sheets, it scans all subfolders recursively.
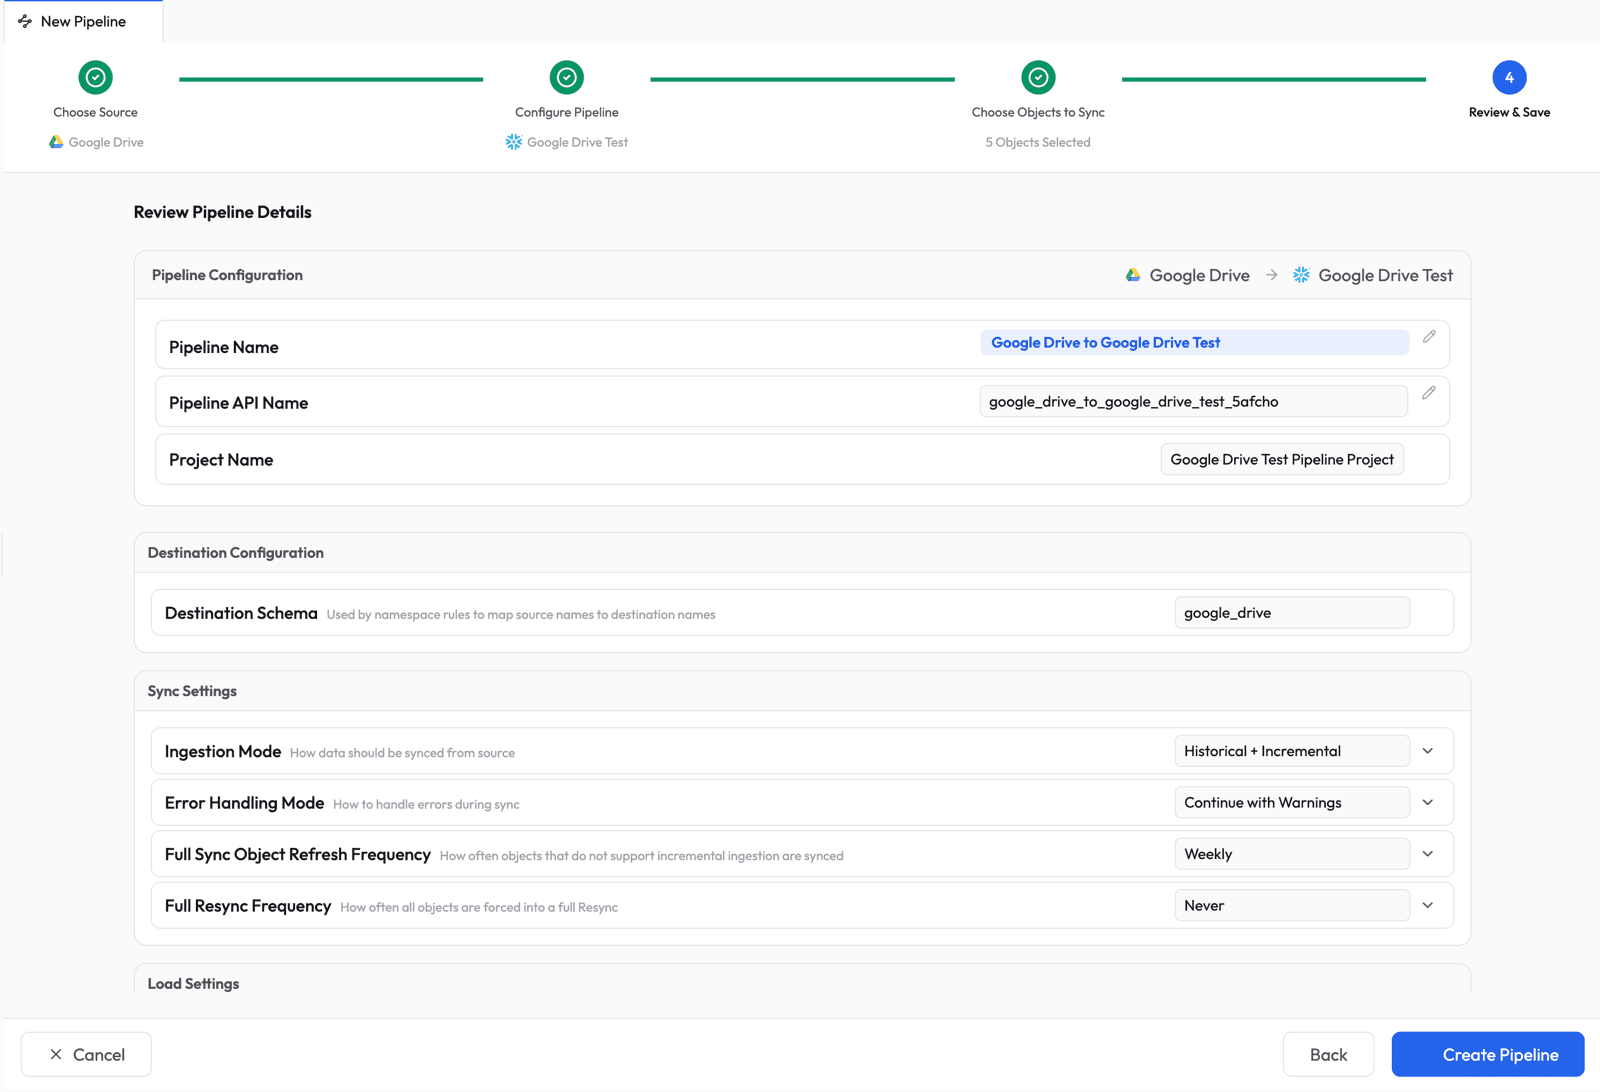
Review and Save
Review the pipeline summary. Supaflow auto-generates a pipeline name and destination schema. Adjust any settings if needed, then click Create Pipeline.
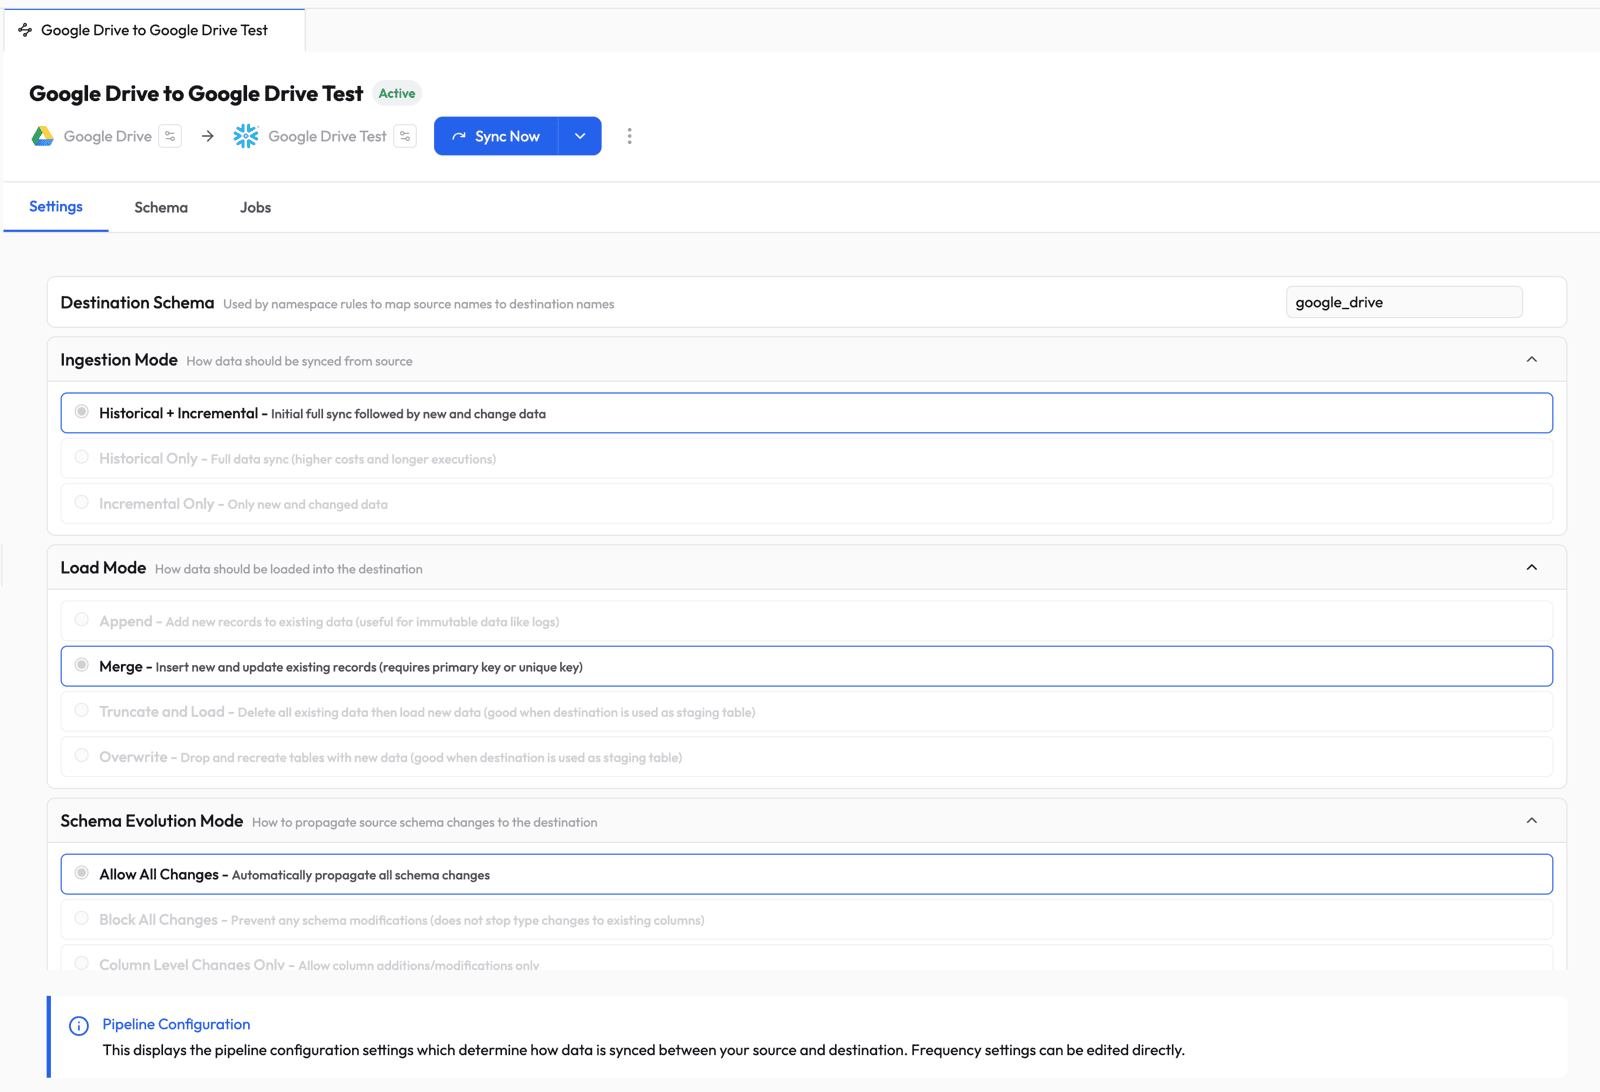
Step 6: Run the Pipeline
The pipeline is now active. Click Sync Now to trigger the first run.
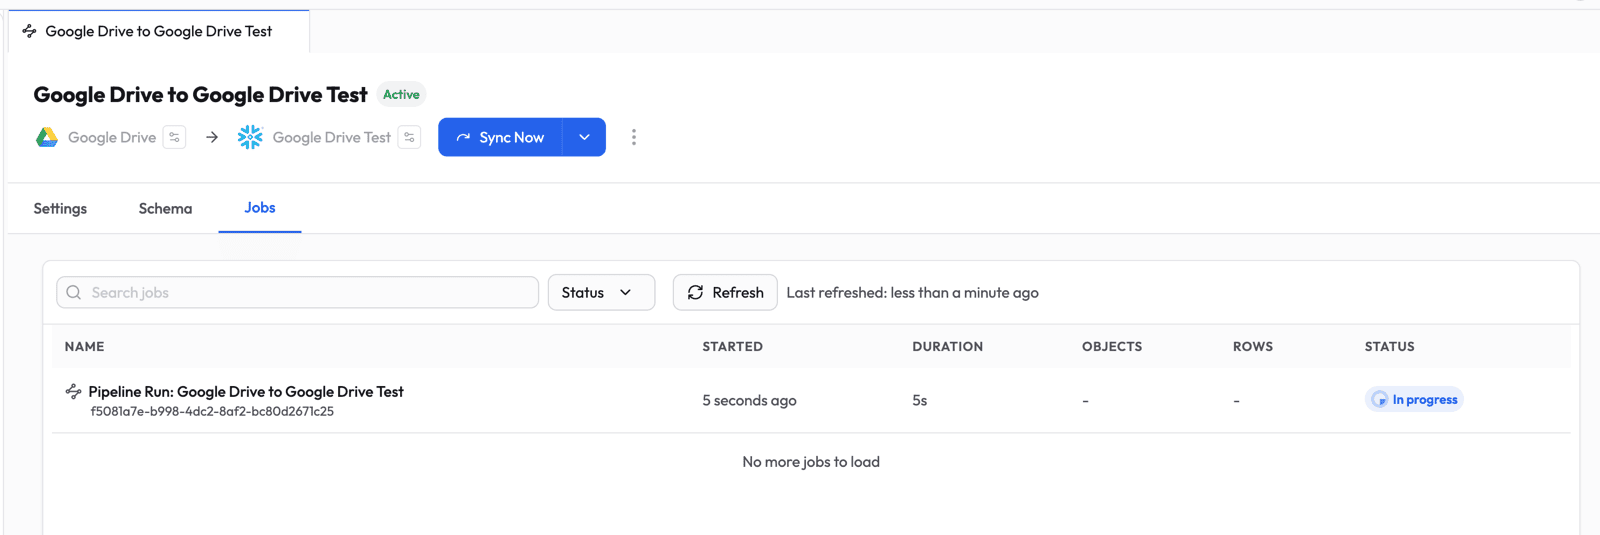
Step 7: Monitor Progress
Switch to the Jobs tab to watch the pipeline run in real time.
Click into the job to see per-object progress -- ingested rows, loaded rows, duration, and status for each table.
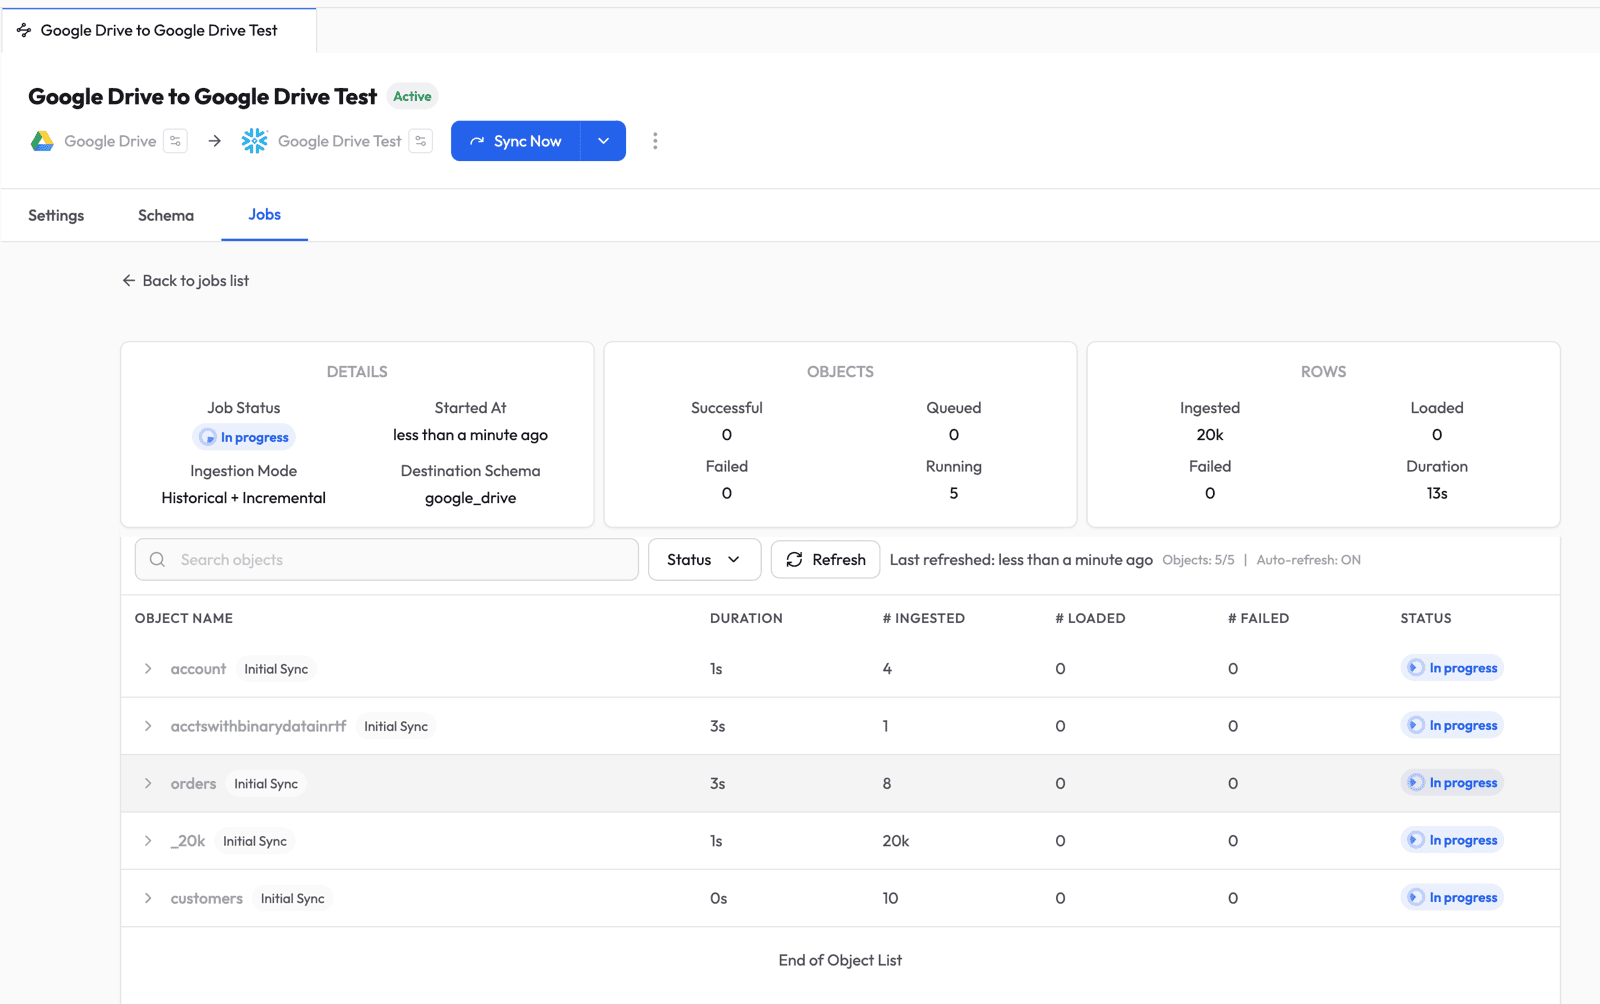
Once all objects complete, the job shows a Completed status with a full summary.

Step 8: Verify in Snowflake
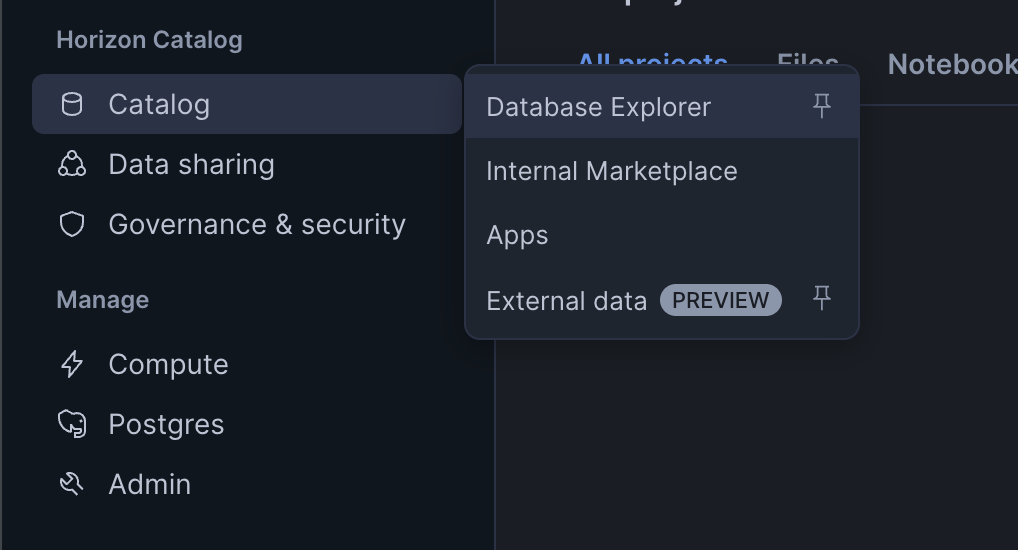
Log into Snowflake, navigate to Catalog > Database Explorer, and browse to the database and schema you configured.
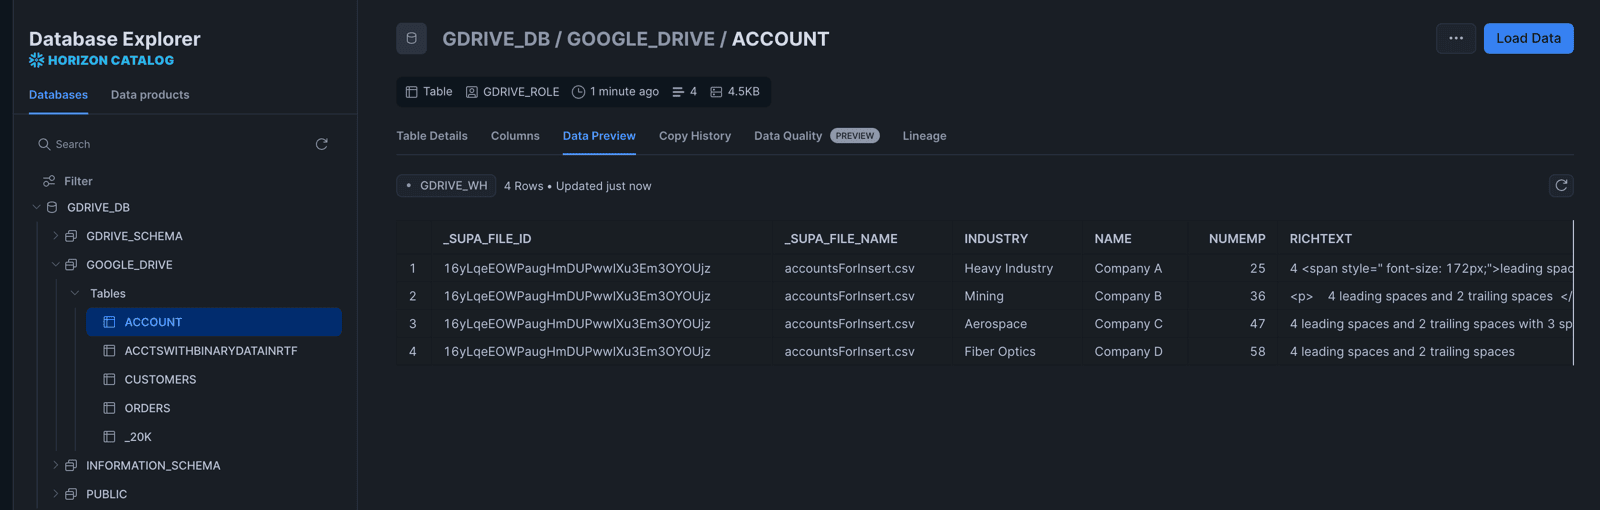
Select any table to preview the data. You should see the rows from your CSV files loaded and ready to query.
What Happens Next
After the initial sync, Supaflow handles ongoing changes automatically:
- New or modified files are picked up on the next incremental run (only changed files are re-read, not the entire folder)
- New folders appear as new tables after a schema refresh
- Schema changes (new columns, type changes) are propagated to Snowflake based on your schema evolution settings
- CSV/TSV files with slightly different columns across the same folder are unioned automatically -- missing values become
null - Excel and Google Sheets edits trigger a full re-read of all worksheets in that file, since Drive tracks modification at the file level
Every synced row includes _supa_file_name and _supa_file_id fields, so you can always trace data back to its source file in Google Drive.
You can schedule runs on a cadence or trigger them manually with Sync Now whenever you need fresh data. See the ingestion pipelines docs for more on pipeline configuration, scheduling, and sync modes.
Get Started
Sign up at app.supa-flow.io and connect your Google Drive in minutes. For full details, check out the Google Drive source docs, the Snowflake destination docs, and the pipeline configuration guide. If you have questions, reach out at support@supa-flow.io.