Sync SQL Server to Snowflake with Change Tracking

Need to replicate your SQL Server tables into Snowflake? Supaflow's SQL Server connector supports two query modes: Standard for simple cursor-based sync, and Change Tracking for capturing every insert, update, and delete -- including hard deletes that standard mode can never detect.
This guide walks through setting up a SQL Server to Snowflake pipeline with Change Tracking enabled, so your Snowflake tables stay in sync with every change made in SQL Server.
Why Change Tracking?
Most data replication tools use a "last modified timestamp" column to detect changes. This works for inserts and updates, but it has a fundamental limitation: deleted rows are invisible. Once a row is deleted from SQL Server, there is no timestamp to query -- the row is simply gone, and your destination never finds out.
SQL Server Change Tracking solves this at the database engine level. When enabled, SQL Server maintains an internal change log that records every row-level operation (insert, update, delete) along with the primary key of the affected row. Supaflow reads this change log directly, so it can capture all three operation types -- including deletes.
Here is how the two modes compare:
| Capability | Standard Mode | Change Tracking Mode |
|---|---|---|
| Inserts | Detected via cursor column | Detected via change log |
| Updates | Detected via cursor column | Detected via change log |
| Deletes | Not detected | Detected |
| Requires cursor column | Yes (LastModifiedDate, etc.) | No (uses internal version) |
| Requires primary key | No | Yes |
| SQL Server setup | None | Enable CT on database + tables |
Prerequisites
- A Supaflow account (sign up here)
- A SQL Server database (2016 or later) with Change Tracking enabled -- see the setup instructions below
- A Snowflake account with a warehouse, database, and schema ready to receive data -- see the Snowflake destination docs for connection options
Enable Change Tracking on SQL Server
Change Tracking must be enabled at two levels: the database and each table you want to track.
-- 1. Enable Change Tracking on the database (7-day retention)
ALTER DATABASE YourDatabase
SET CHANGE_TRACKING = ON
(CHANGE_RETENTION = 7 DAYS, AUTO_CLEANUP = ON);

-- 2. Enable Change Tracking on each table
ALTER TABLE dbo.customers ENABLE CHANGE_TRACKING;
ALTER TABLE dbo.orders ENABLE CHANGE_TRACKING;
ALTER TABLE dbo.order_items ENABLE CHANGE_TRACKING;

-- 3. Grant the sync user permission to read the change log
GRANT VIEW CHANGE TRACKING ON SCHEMA::dbo TO your_sync_user;
Tables must have a primary key for Change Tracking to work. SQL Server uses the primary key to identify which rows changed.
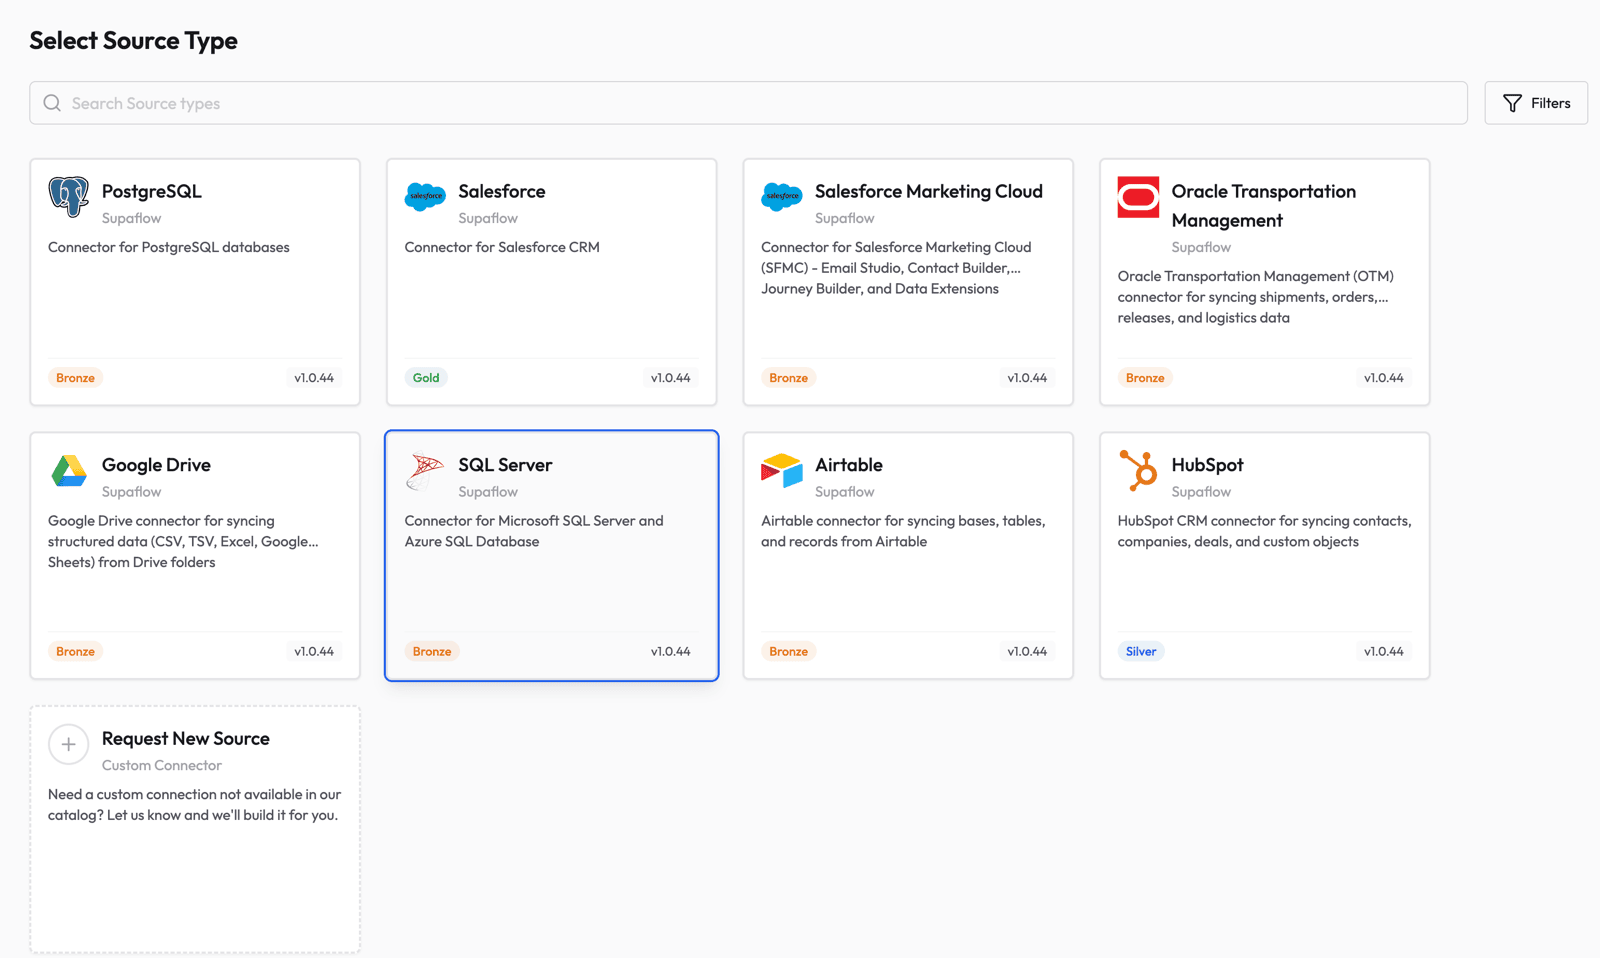
Step 1: Create a SQL Server Source
Go to the Sources page in Supaflow and click Create Source. Select SQL Server from the list of available source types.
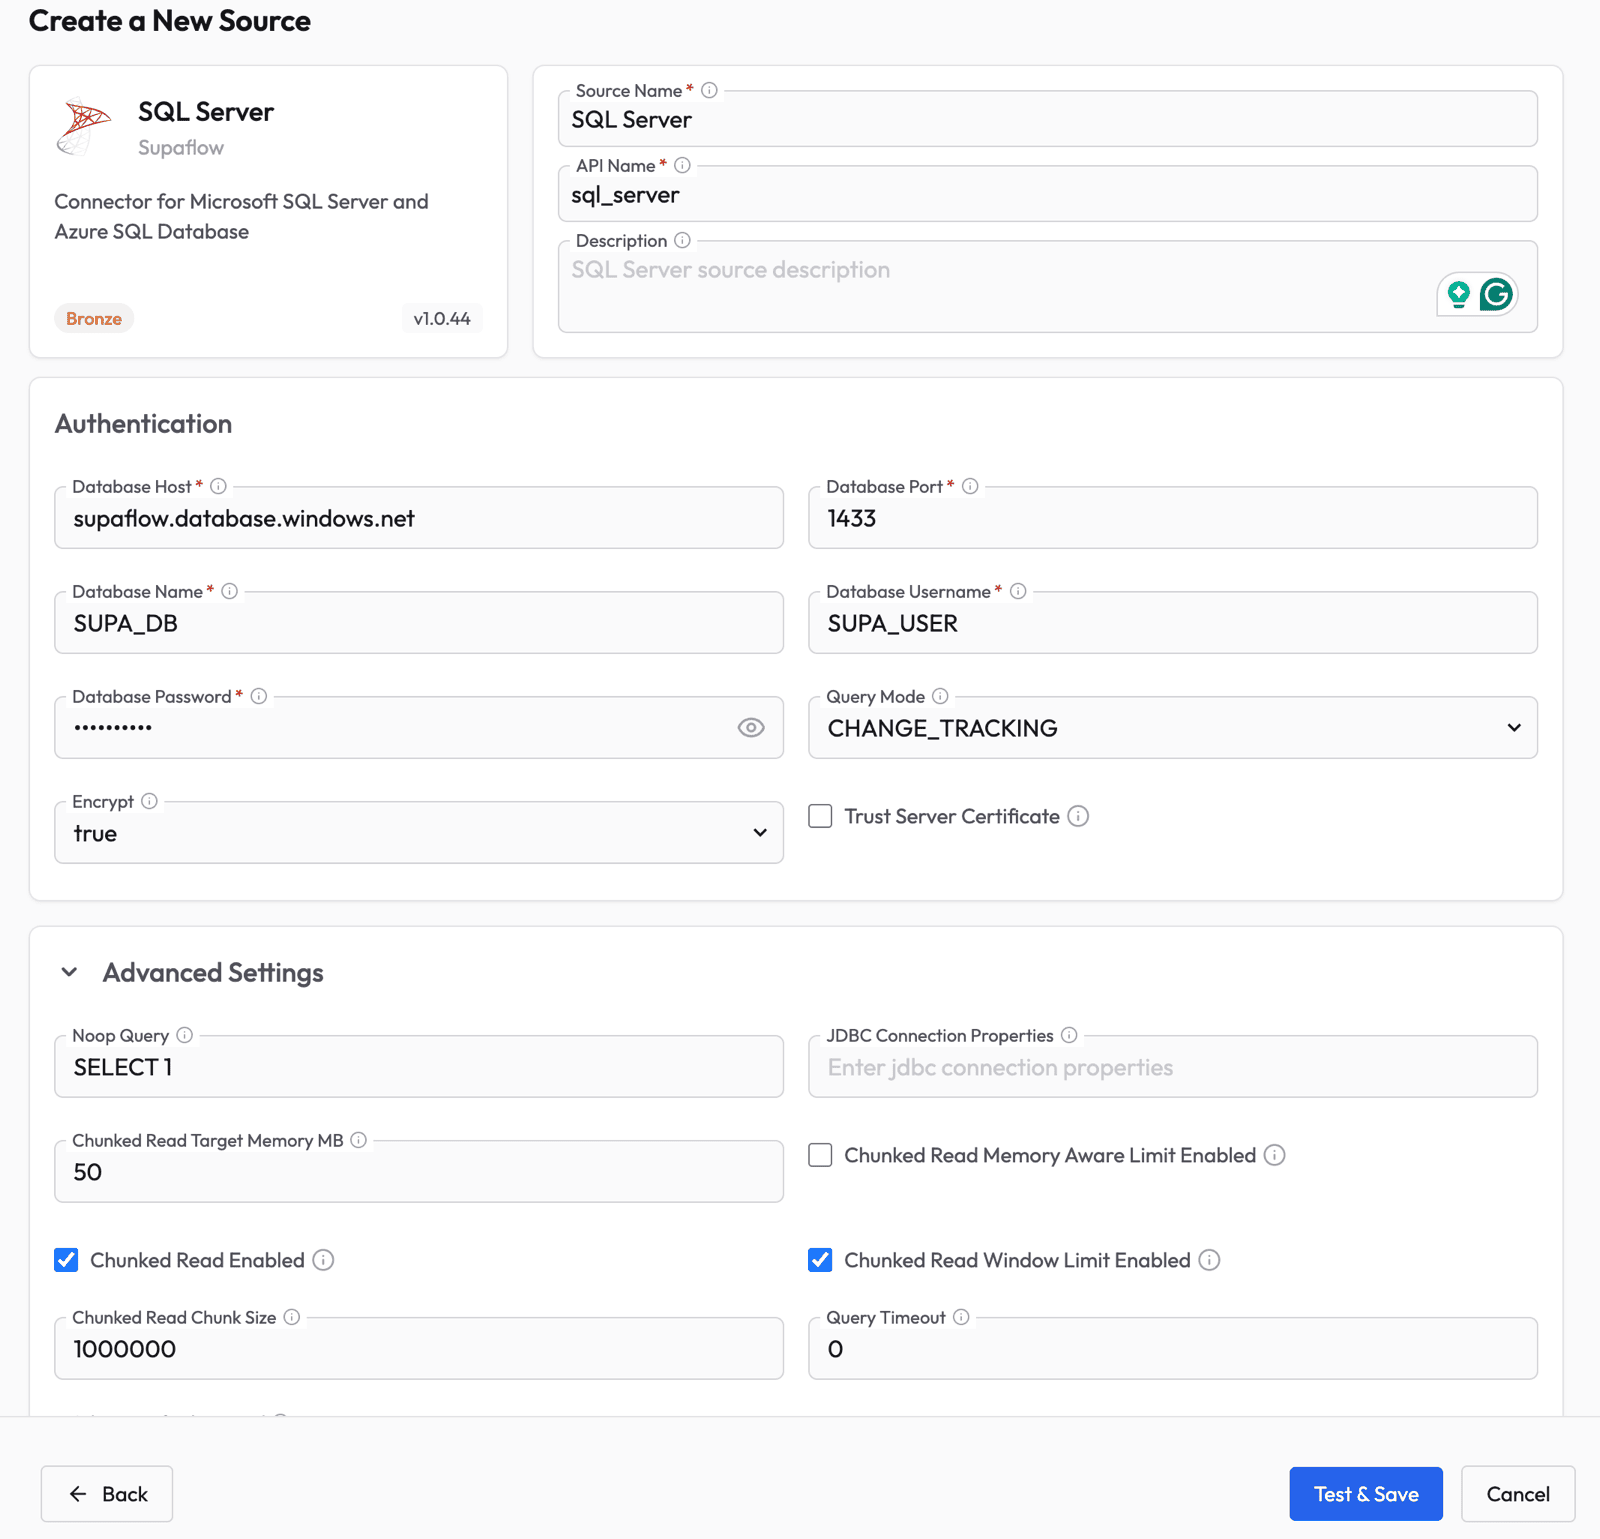
Fill in the source configuration:
- Source Name -- give it a descriptive name (e.g., "SQL Server")
- Database Host -- the hostname or IP of your SQL Server instance
- Database Port -- typically
1433 - Database Name -- the database to sync from
- Database Username and Password -- credentials for the sync user
- Query Mode -- select CHANGE_TRACKING from the dropdown
- Encrypt -- set to
truefor Azure SQL or when TLS is required
The Query Mode setting is the key difference. When set to CHANGE_TRACKING, Supaflow will use SQL Server's built-in change log instead of cursor columns, enabling delete detection on every table that has CT enabled.
Click Test & Save to verify the connection. Supaflow validates that Change Tracking is enabled on the database during the connection test.
After saving, Supaflow automatically discovers your schemas and tables. You will see the source in a "Syncing Schema" state while discovery runs.

Once schema discovery completes, the source transitions to Active and is ready to use in a pipeline.

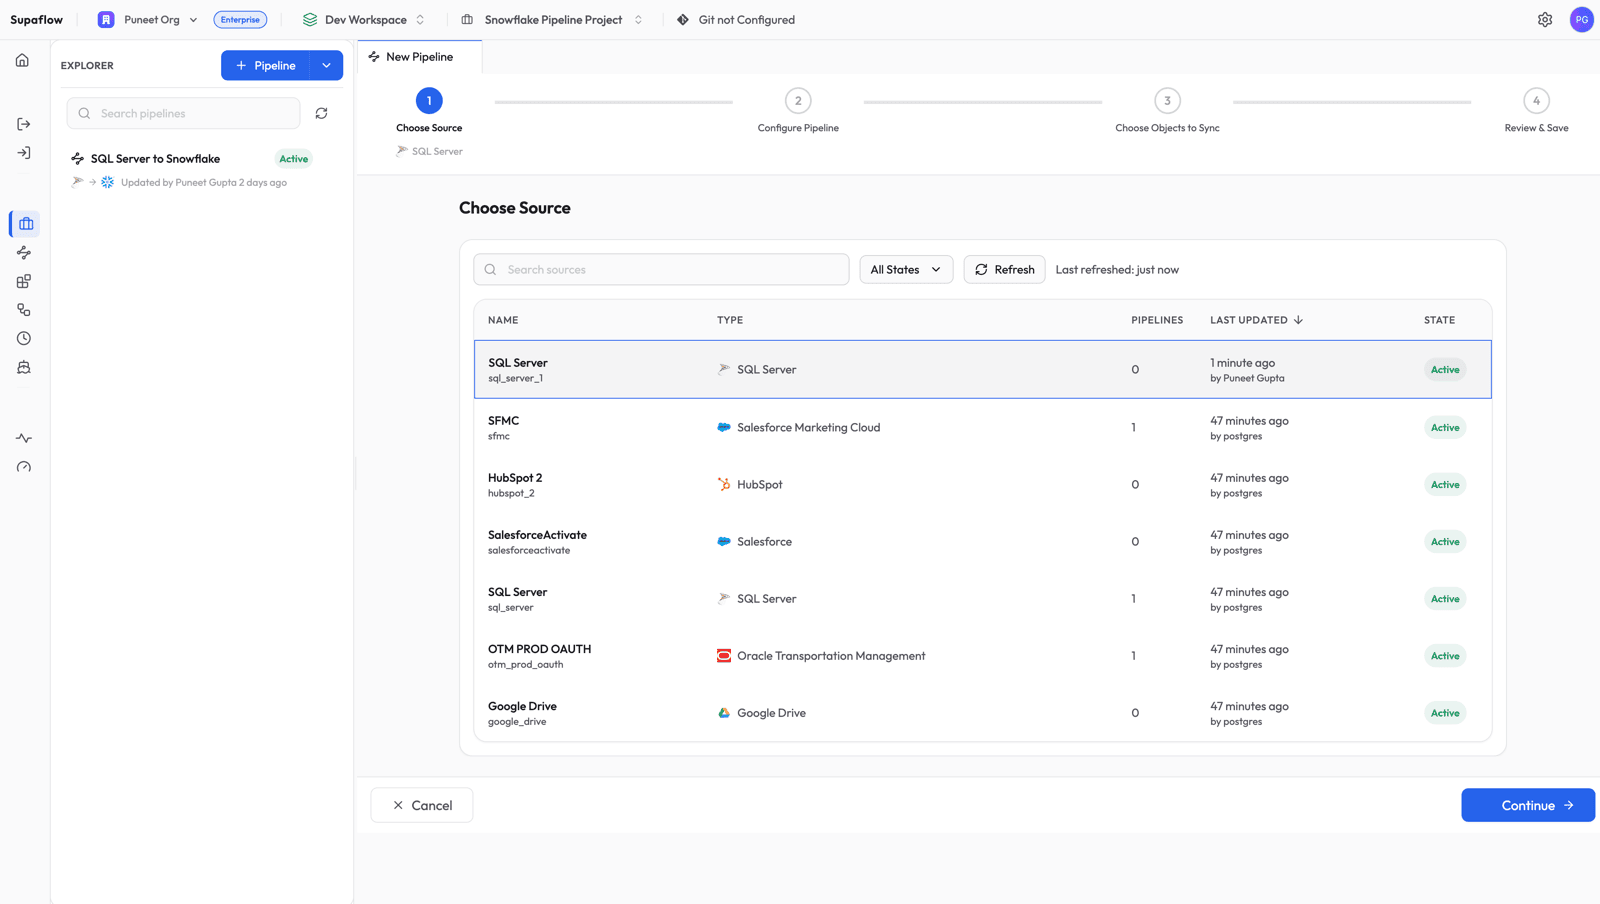
Step 2: Create a Pipeline
Navigate to your project and click Create Pipeline.

Choose Source
Select the SQL Server source you just created and click Continue.
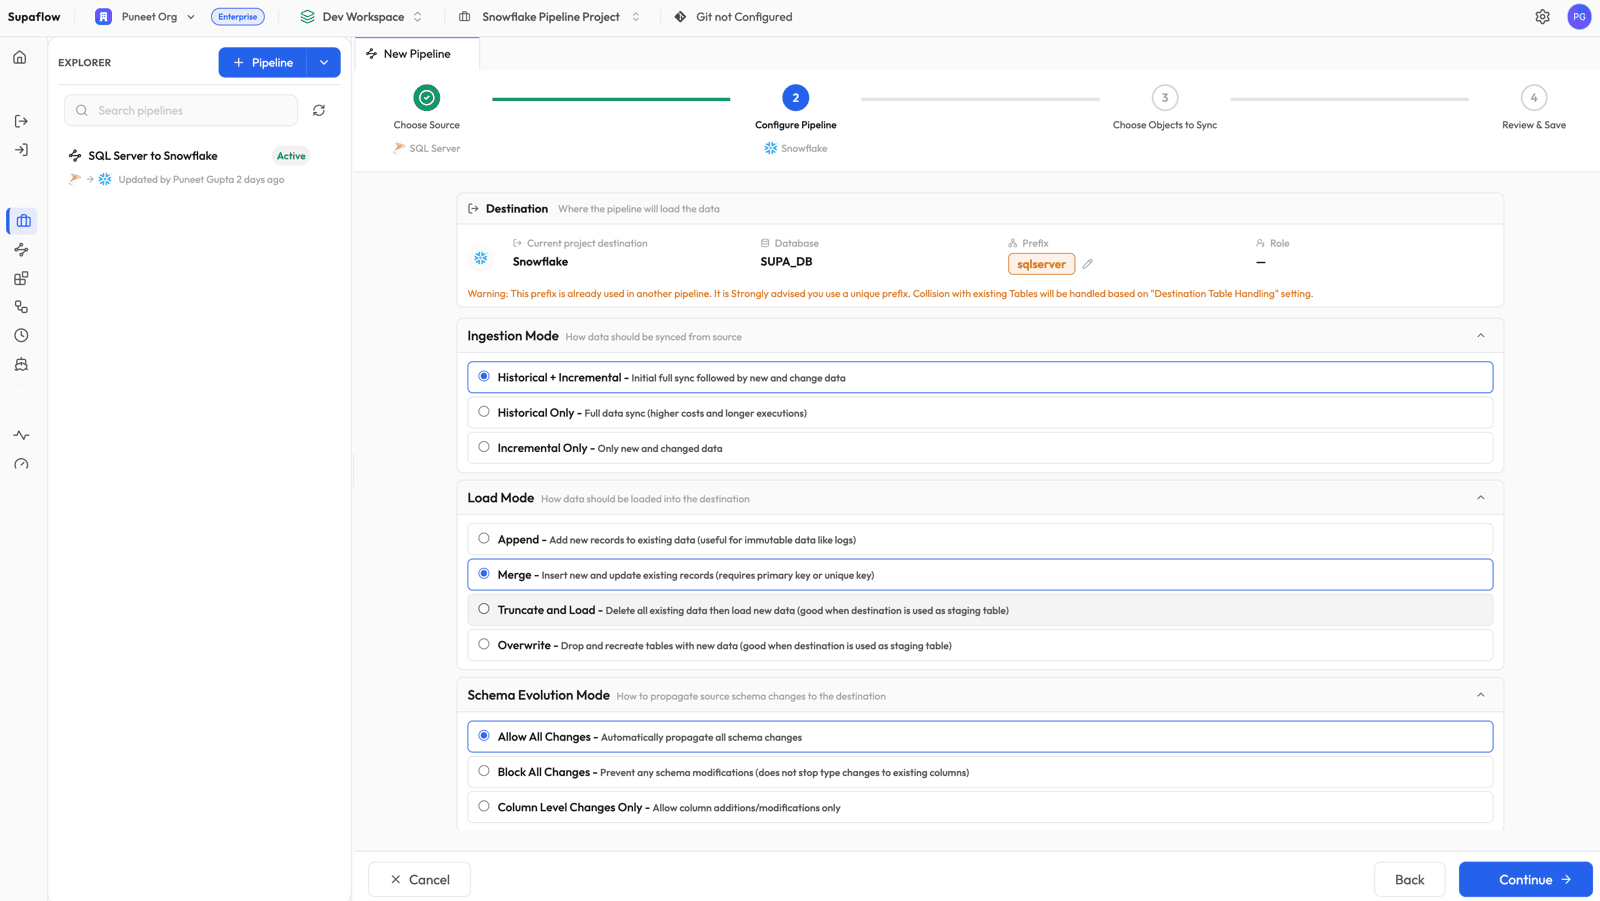
Configure Pipeline Settings
Set the sync behavior for your pipeline:
- Ingestion Mode: Historical + Incremental -- does a full bootstrap on the first run, then uses the change log for subsequent runs
- Load Mode: Merge -- inserts new records and updates existing ones based on primary key (required for Change Tracking so that deletes can be applied)
- Schema Evolution Mode: Allow All Changes -- automatically propagates column additions and type changes to Snowflake
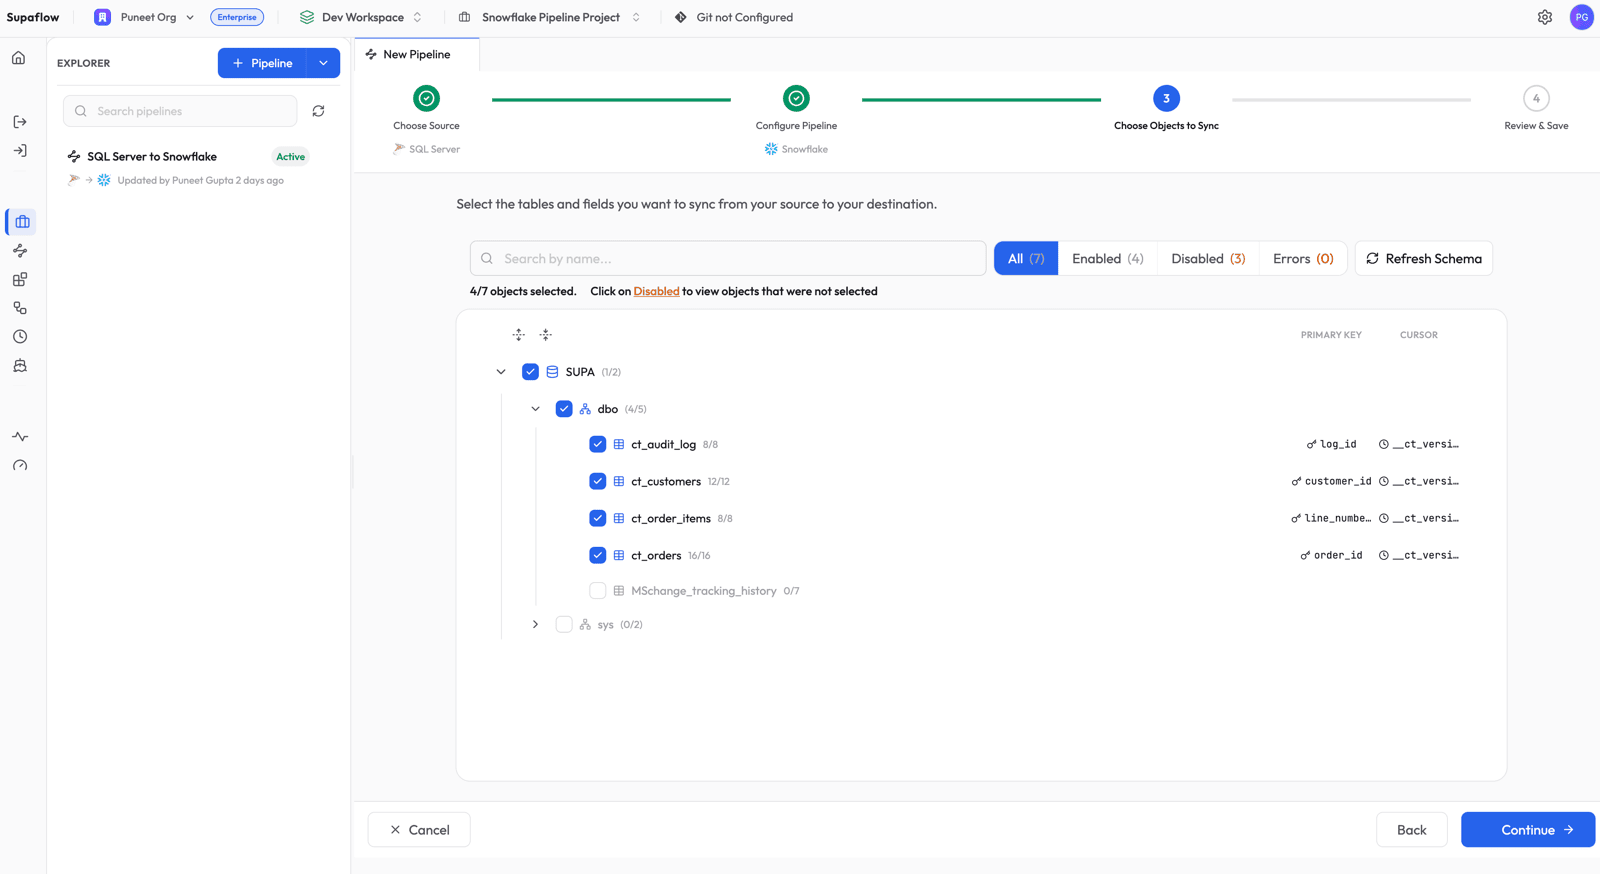
Choose Objects to Sync
Select the tables you want to replicate. Supaflow shows the discovered schema hierarchy with catalog, schema, and table levels. For each Change Tracking table, the Cursor column shows __ct_version -- this is a synthetic field managed automatically by the connector.
You will also notice that tables without Change Tracking enabled (like MSchange_tracking_history) appear as Disabled with a CHANGE_TRACKING_NOT_ENABLED reason. These tables are automatically skipped -- no manual filtering needed.
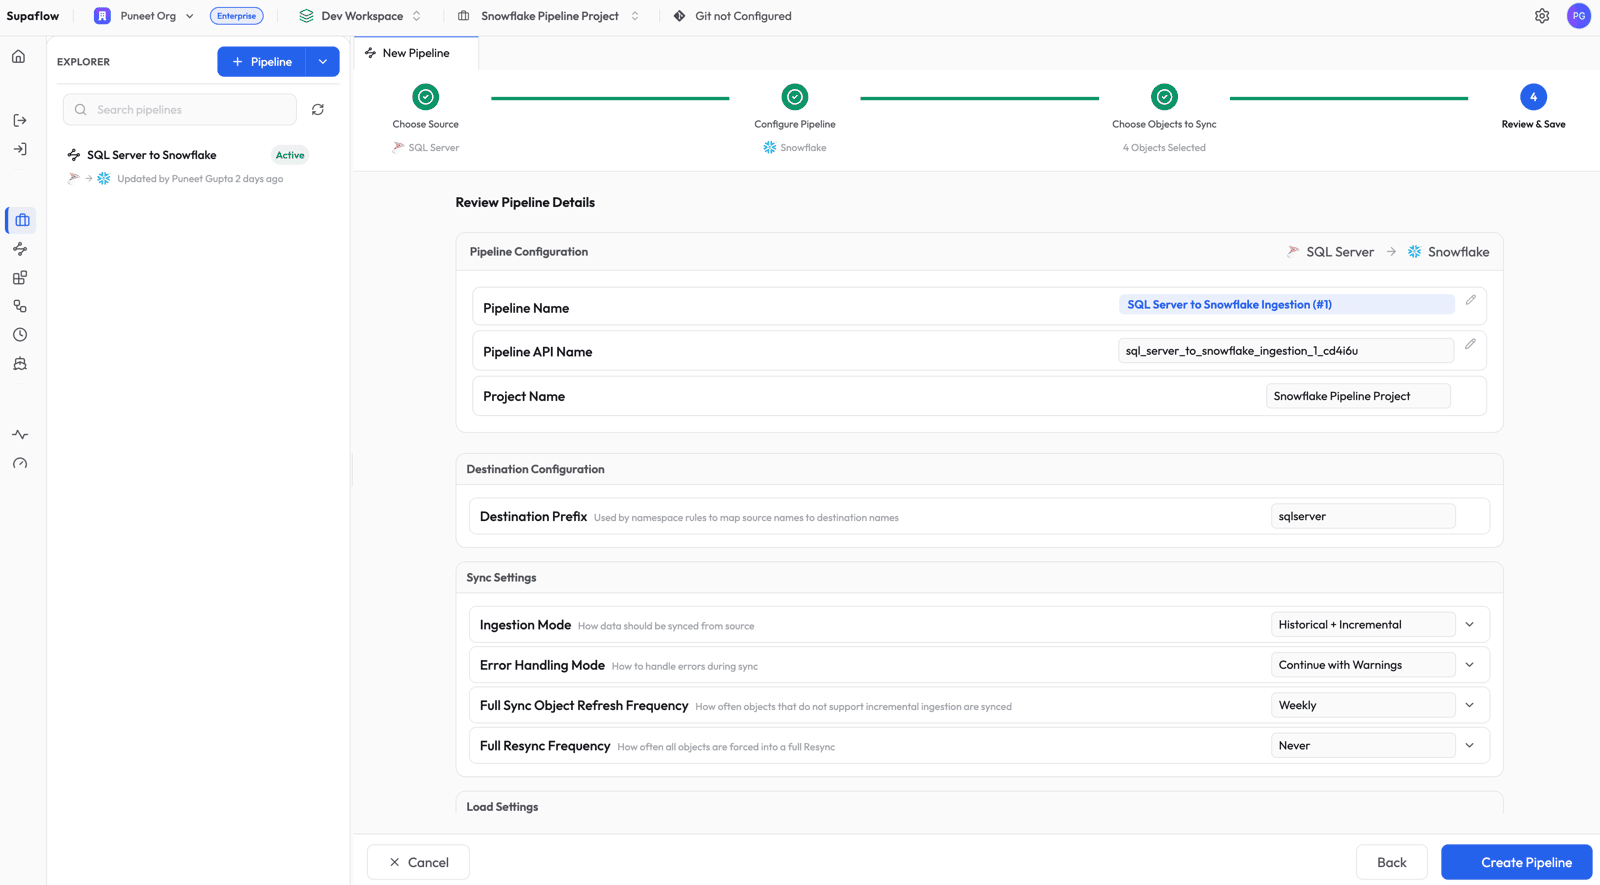
Review and Save
Review the pipeline summary. The destination prefix (sqlserver) determines the schema name in Snowflake. Click Create Pipeline to save.
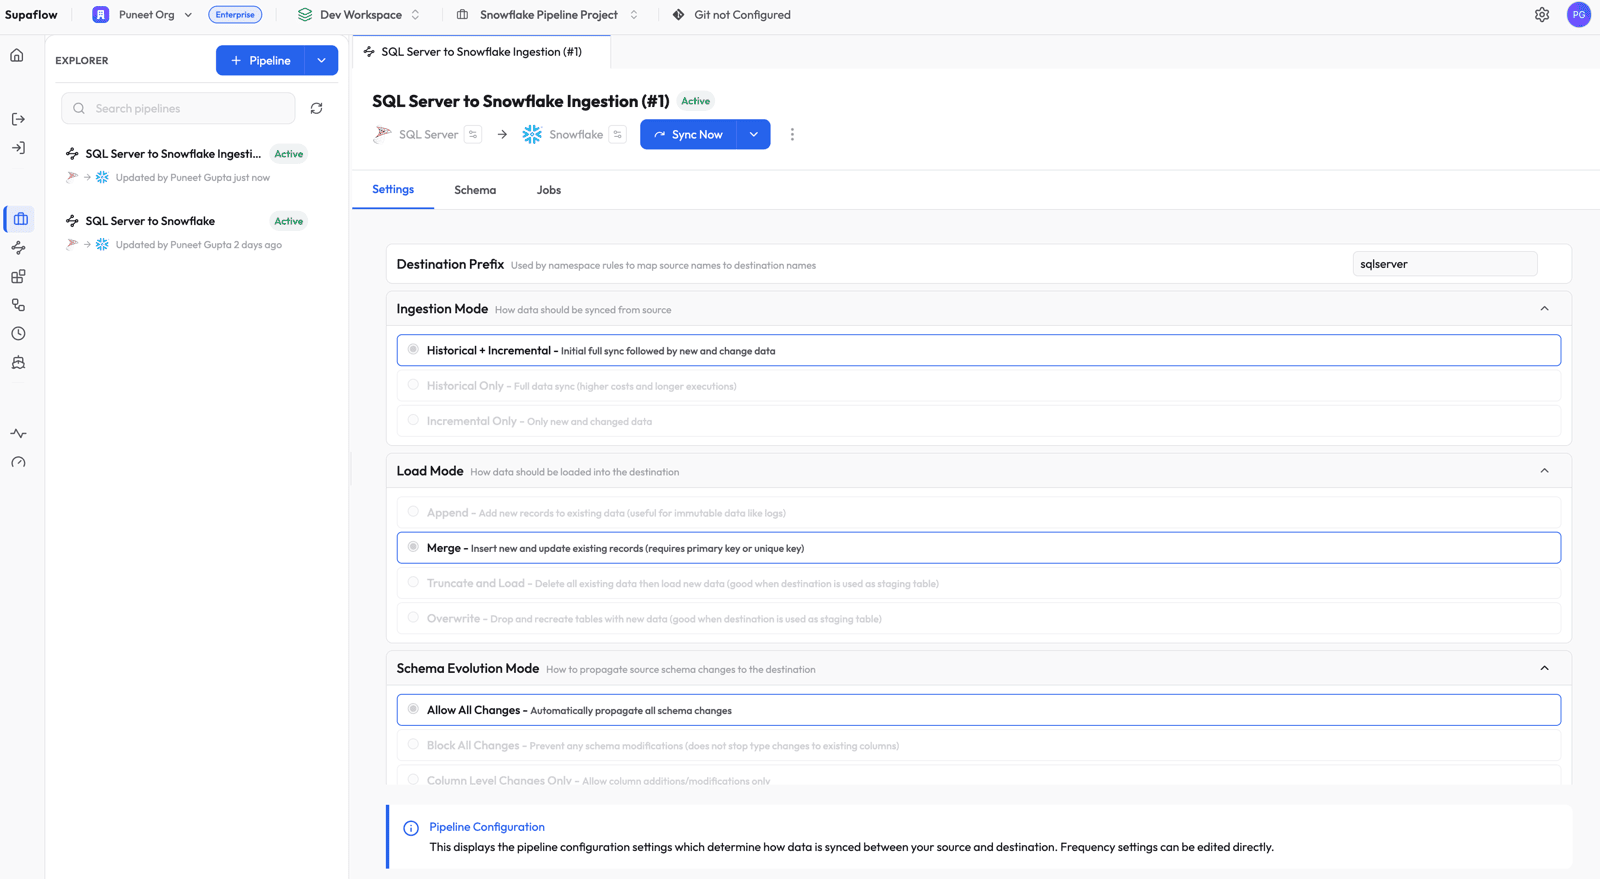
Step 3: Run the Pipeline
The pipeline is now active. Click Sync Now to trigger the first run (the bootstrap).
Step 4: Monitor Progress
Switch to the Jobs tab to watch the pipeline run.
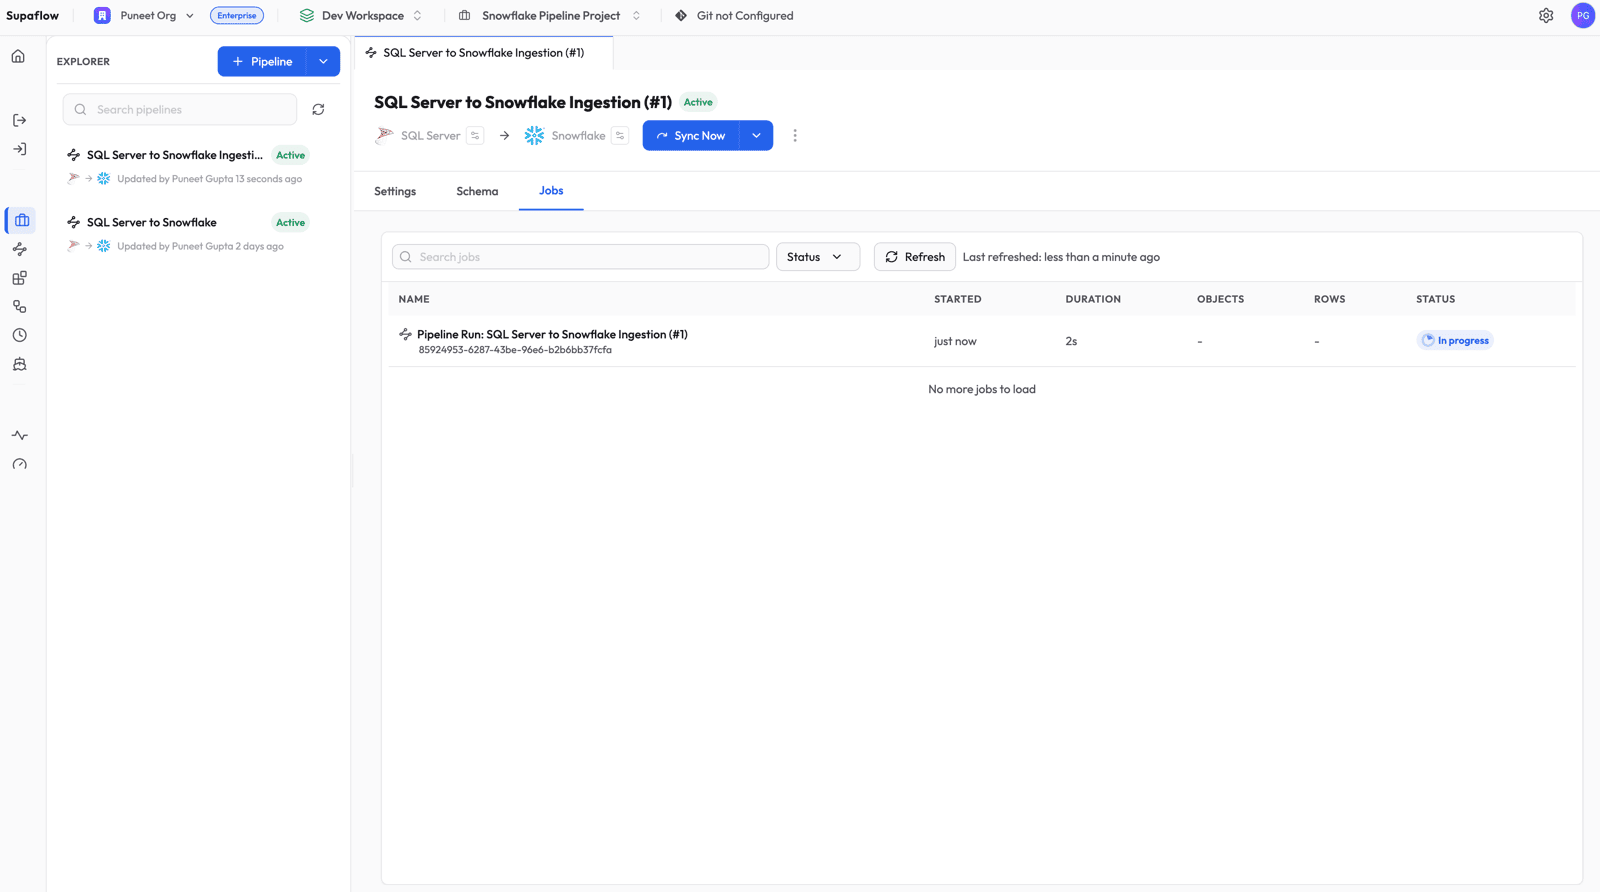
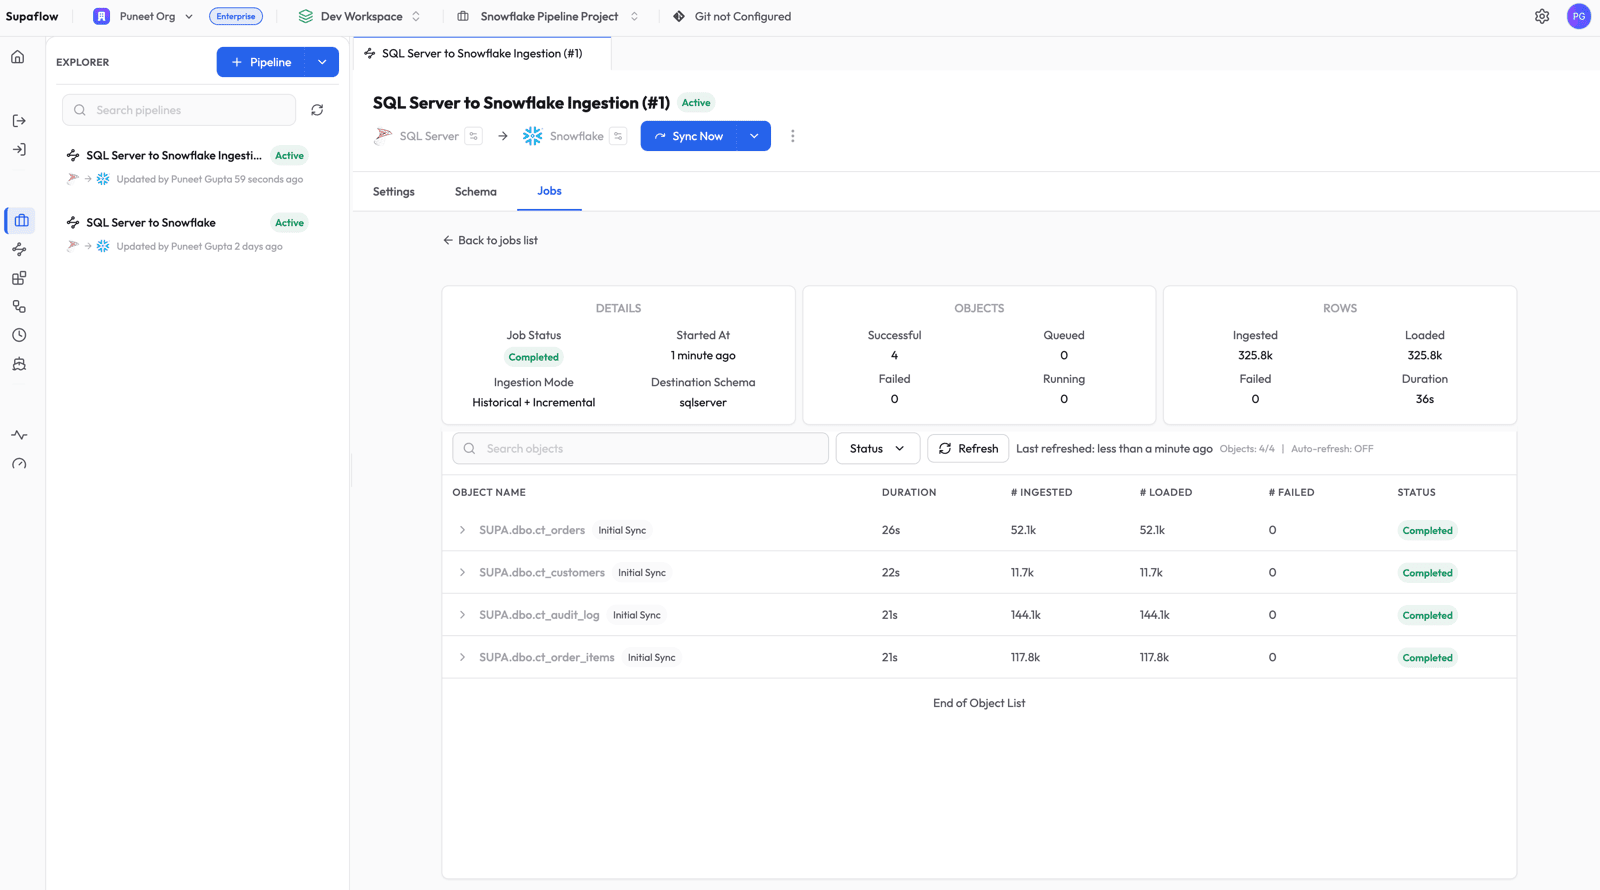
Click into the job to see per-object progress. The first run is labeled Initial Sync -- this is the bootstrap phase where Supaflow reads the full table and snapshots the current Change Tracking version.
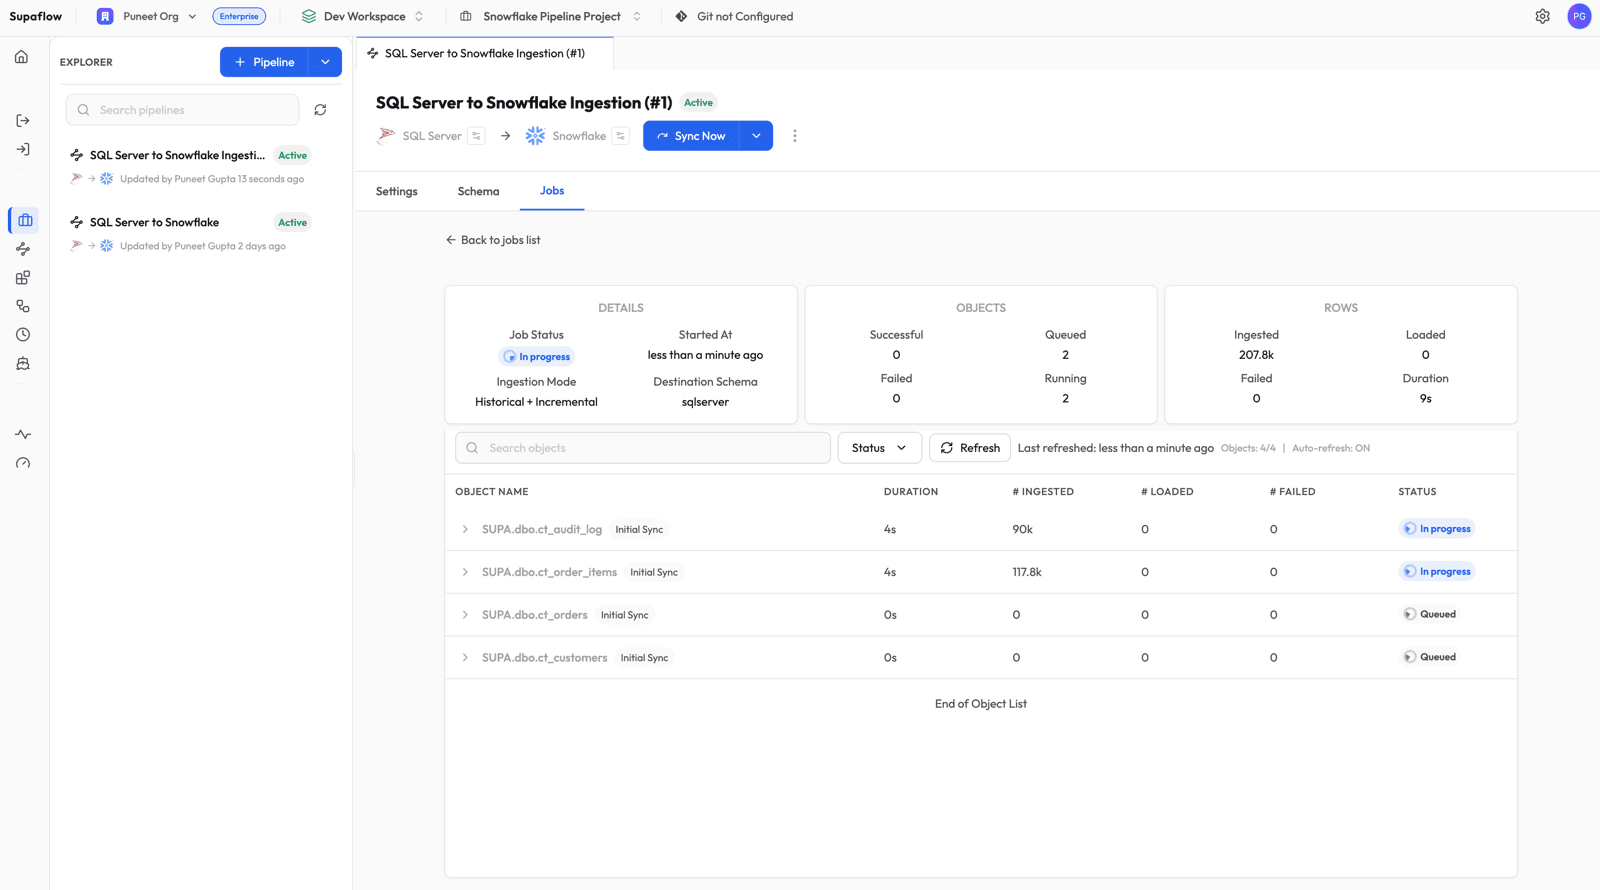
Once all objects complete, the job shows a Completed status with row counts for each table.
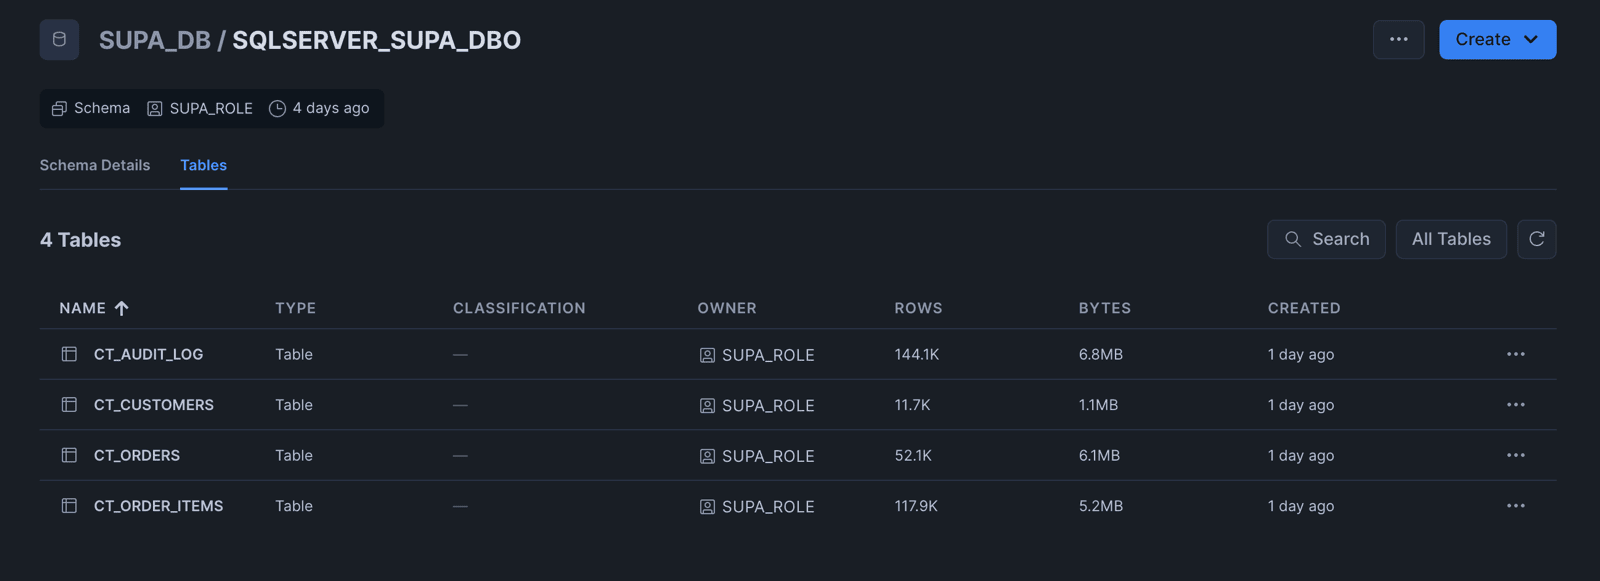
Step 5: Verify in Snowflake
Log into Snowflake and browse to the destination schema. You will see your SQL Server tables loaded and ready to query.
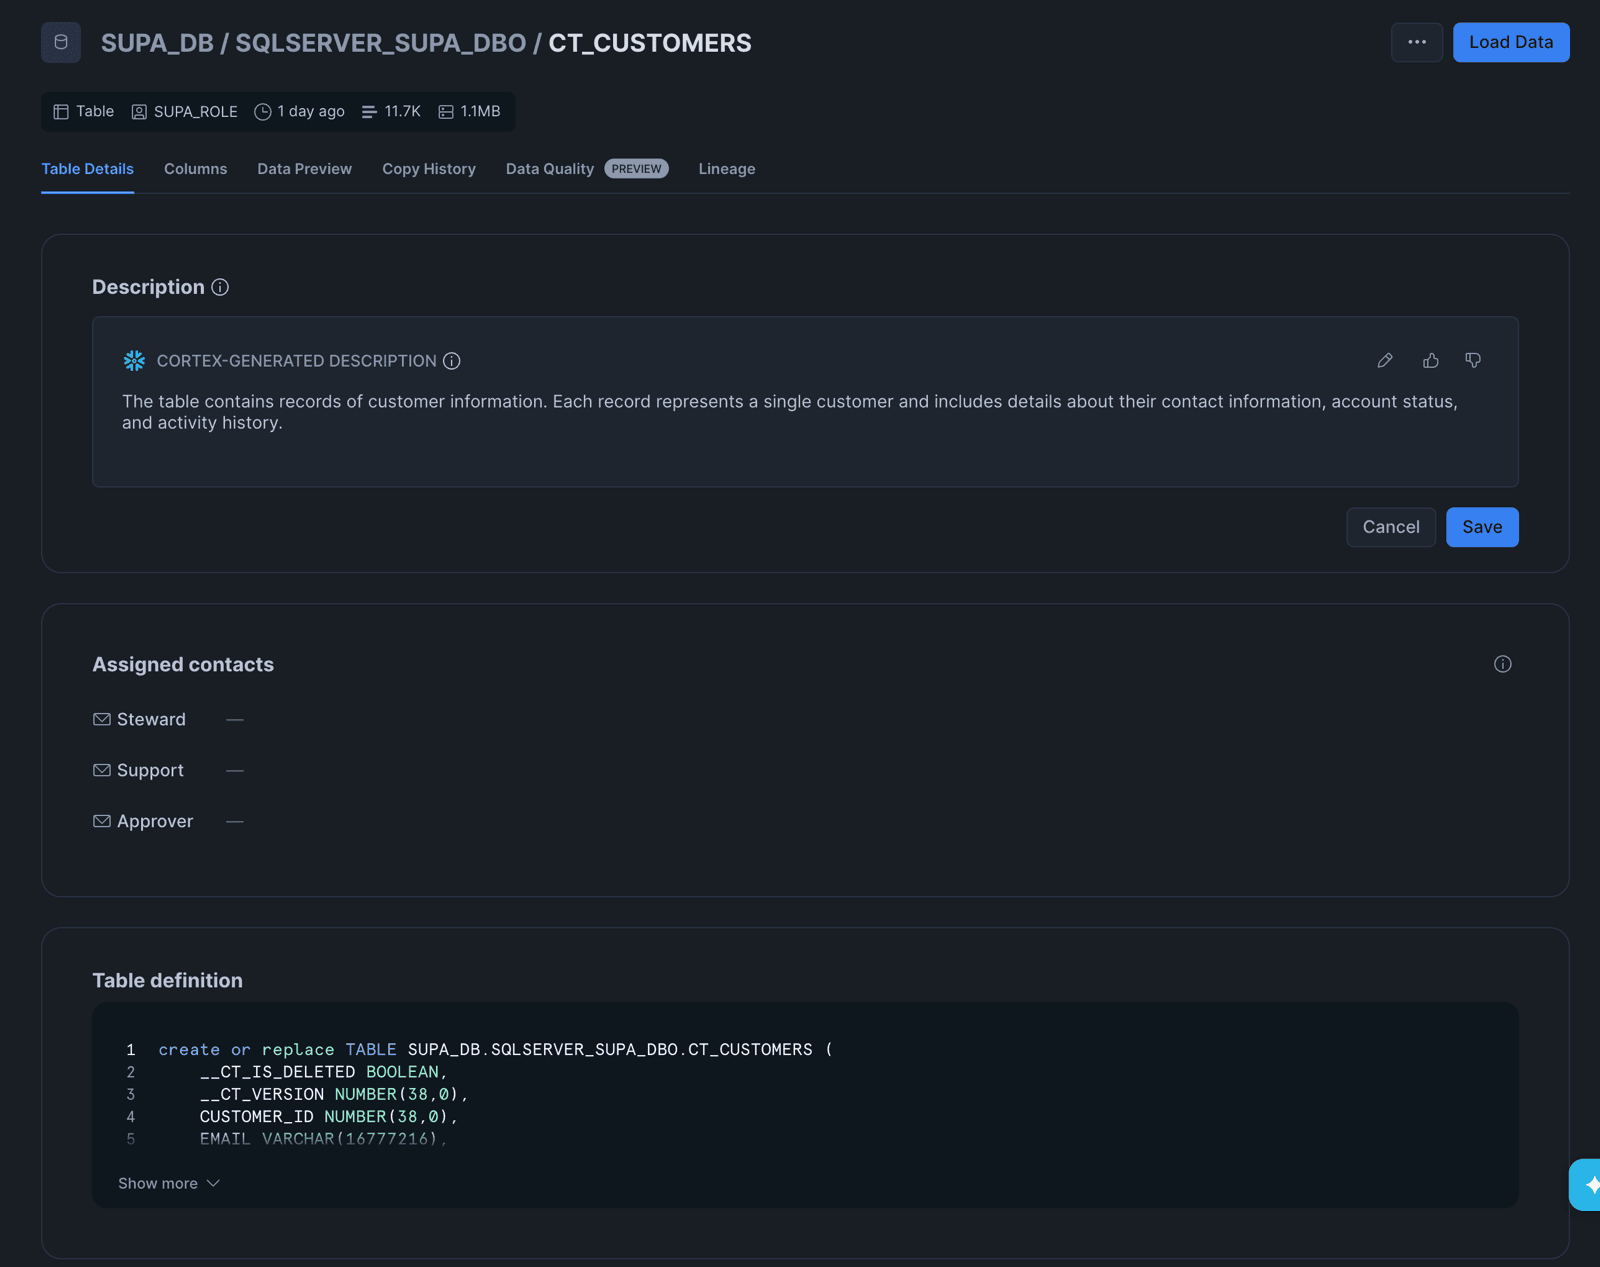
Click into any table to see the table definition. Notice the two synthetic columns that Supaflow adds for Change Tracking tables:
__CT_IS_DELETED(BOOLEAN) --truefor deleted rows,falsefor active rows__CT_VERSION(NUMBER) -- the Change Tracking version when the row was last modified
These columns are managed automatically by the connector. You do not need to define them in your source tables.
How Change Tracking Works Under the Hood
Bootstrap (First Run)
On the first sync, Supaflow reads the entire table using a standard SELECT query. At the start of the read, it captures the current Change Tracking version as a snapshot point. Every row is written to Snowflake with __ct_is_deleted = false and __ct_version set to the snapshot version.
Incremental Runs (Subsequent Syncs)
After the bootstrap, every subsequent run queries only the change log:
SELECT c.SYS_CHANGE_VERSION, c.SYS_CHANGE_OPERATION,
       c.pk_column, t.col1, t.col2, ...
FROM CHANGETABLE(CHANGES dbo.customers, @last_version) AS c
LEFT JOIN dbo.customers AS t ON c.pk_column = t.pk_column
WHERE c.SYS_CHANGE_VERSION <= @current_version
This query returns only the rows that changed since the last sync. For each row:
- Insert or Update (
SYS_CHANGE_OPERATION = 'I'or'U'): the full row data is returned from theLEFT JOIN, with__ct_is_deleted = false - Delete (
SYS_CHANGE_OPERATION = 'D'): the primary key columns are returned from the change log, all data columns arenull(the row no longer exists), and__ct_is_deleted = true
In Snowflake, the Merge load mode uses the primary key to upsert inserts/updates and soft-delete the deleted rows by setting __CT_IS_DELETED = TRUE.
Stale Version Recovery
SQL Server retains change history for the configured retention period (default: 7 days). If a sync does not run within this window, the change log may be purged and the connector receives a "stale version" error. Supaflow handles this automatically by re-running a full bootstrap and resetting the destination table -- no manual intervention needed.
Querying Change-Tracked Data in Snowflake
Once your data is in Snowflake, you can use the __CT_IS_DELETED column to filter active records:
-- Active records only
SELECT * FROM SQLSERVER_SUPA_DBO.CT_CUSTOMERS
WHERE __CT_IS_DELETED = FALSE;

-- Recently deleted records
SELECT * FROM SQLSERVER_SUPA_DBO.CT_CUSTOMERS
WHERE __CT_IS_DELETED = TRUE;

-- All changes since a specific version
SELECT * FROM SQLSERVER_SUPA_DBO.CT_CUSTOMERS
WHERE __CT_VERSION > 42;
This is particularly useful for:
- Audit trails: know exactly which records were deleted and when they were last seen
- Soft-delete patterns: filter out deleted rows in views or downstream transformations
- Data quality checks: detect unexpected deletions in source systems
What Happens Next
After the initial sync, Supaflow handles ongoing changes automatically:
- Inserts, updates, and deletes are captured on every incremental run via the change log
- Schema changes (new columns, type changes) are propagated to Snowflake based on your schema evolution settings
- New tables with Change Tracking enabled appear after a schema refresh
- Tables without CT are automatically skipped with a clear reason, so they do not block the pipeline
You can schedule runs on a cadence or trigger them manually with Sync Now. For full details on pipeline configuration, scheduling, and sync modes, see the SQL Server source docs and the pipeline configuration guide.
Get Started
Sign up at app.supa-flow.io and connect your SQL Server in minutes. For a feature overview and how Supaflow compares to other options, see the SQL Server to Snowflake connector page. For full setup details, check out the SQL Server source docs, the Snowflake destination docs, and the pipeline configuration guide. If you have questions, reach out at support@supa-flow.io.