Prepare Google Cloud for a BigQuery Destination
Use this guide when you need to create the Google Cloud resources required by the Supaflow Google BigQuery destination. It covers the Google Cloud console workflow, an equivalent CLI handoff, and the final Test & Save validation in Supaflow.
What You Will Create
| Resource | Example used in this guide | Requirement |
|---|---|---|
| Google Cloud project | acme-bigquery-production | Billing enabled; a dedicated Supaflow data project is recommended |
| Default BigQuery dataset | supaflow_data | Required fallback; same location as the staging bucket |
| Cloud Storage bucket | acme-bigquery-production-staging | Globally unique name; customer owned |
| Staging prefix | supaflow/ | Reserved for Supaflow temporary objects |
| Supaflow identity | Generated in the destination form | Managed service account recommended |
This guide uses the US multi-region. Choose the location required by your organization, then use that exact location for the datasets, bucket, and Supaflow Location field. US and us-central1 are different locations.
With Supaflow's default namespace rules, a pipeline can create datasets derived from its destination prefix and source namespaces. For a source without schemas, examples include salesforce and salesforce_2. Default Dataset remains required as a fallback and becomes the target when a pipeline uses Destination Defined namespace rules.
Before You Begin
You need permission to:
- Create a project in the intended organization or folder
- Link the project to an active Cloud Billing account
- Enable Google Cloud APIs
- Create BigQuery datasets and Cloud Storage buckets
- Grant BigQuery Data Editor and BigQuery Job User at project scope
- Update bucket IAM policies
If your organization separates these duties, give the CLI handoff to the Google Cloud administrator and provide the Supaflow-managed service-account email after Supaflow generates it.
Console Setup
1. Create and bill the project
- In the Google Cloud console, open the project selector and click New Project.
- Enter a descriptive Project name.
- Click Edit beside Project ID and enter a permanent, globally unique project ID.
- Select the required Billing account, Organization, and Parent resource.
- Click Create and wait for the project to become available.
- Select the new project in the project selector before continuing.
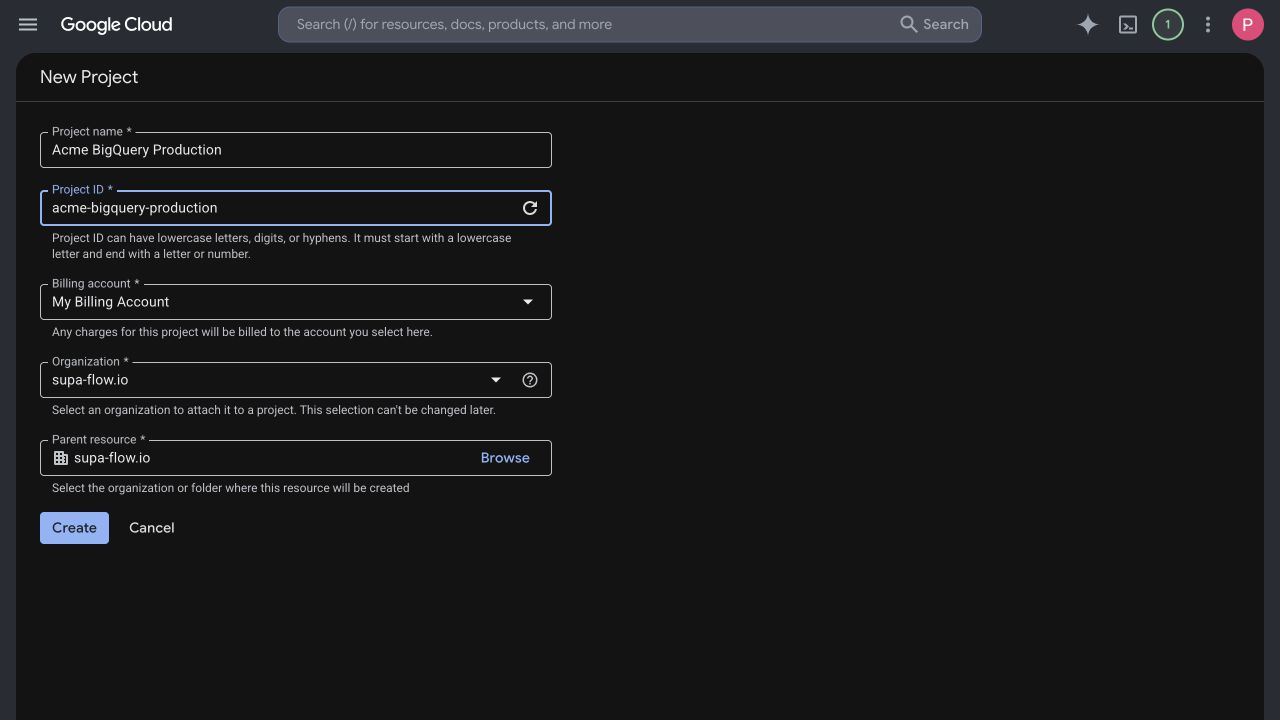
Project IDs cannot be changed after project creation. Bucket names are also globally unique, so a common pattern is <project-id>-staging.
2. Enable the BigQuery API
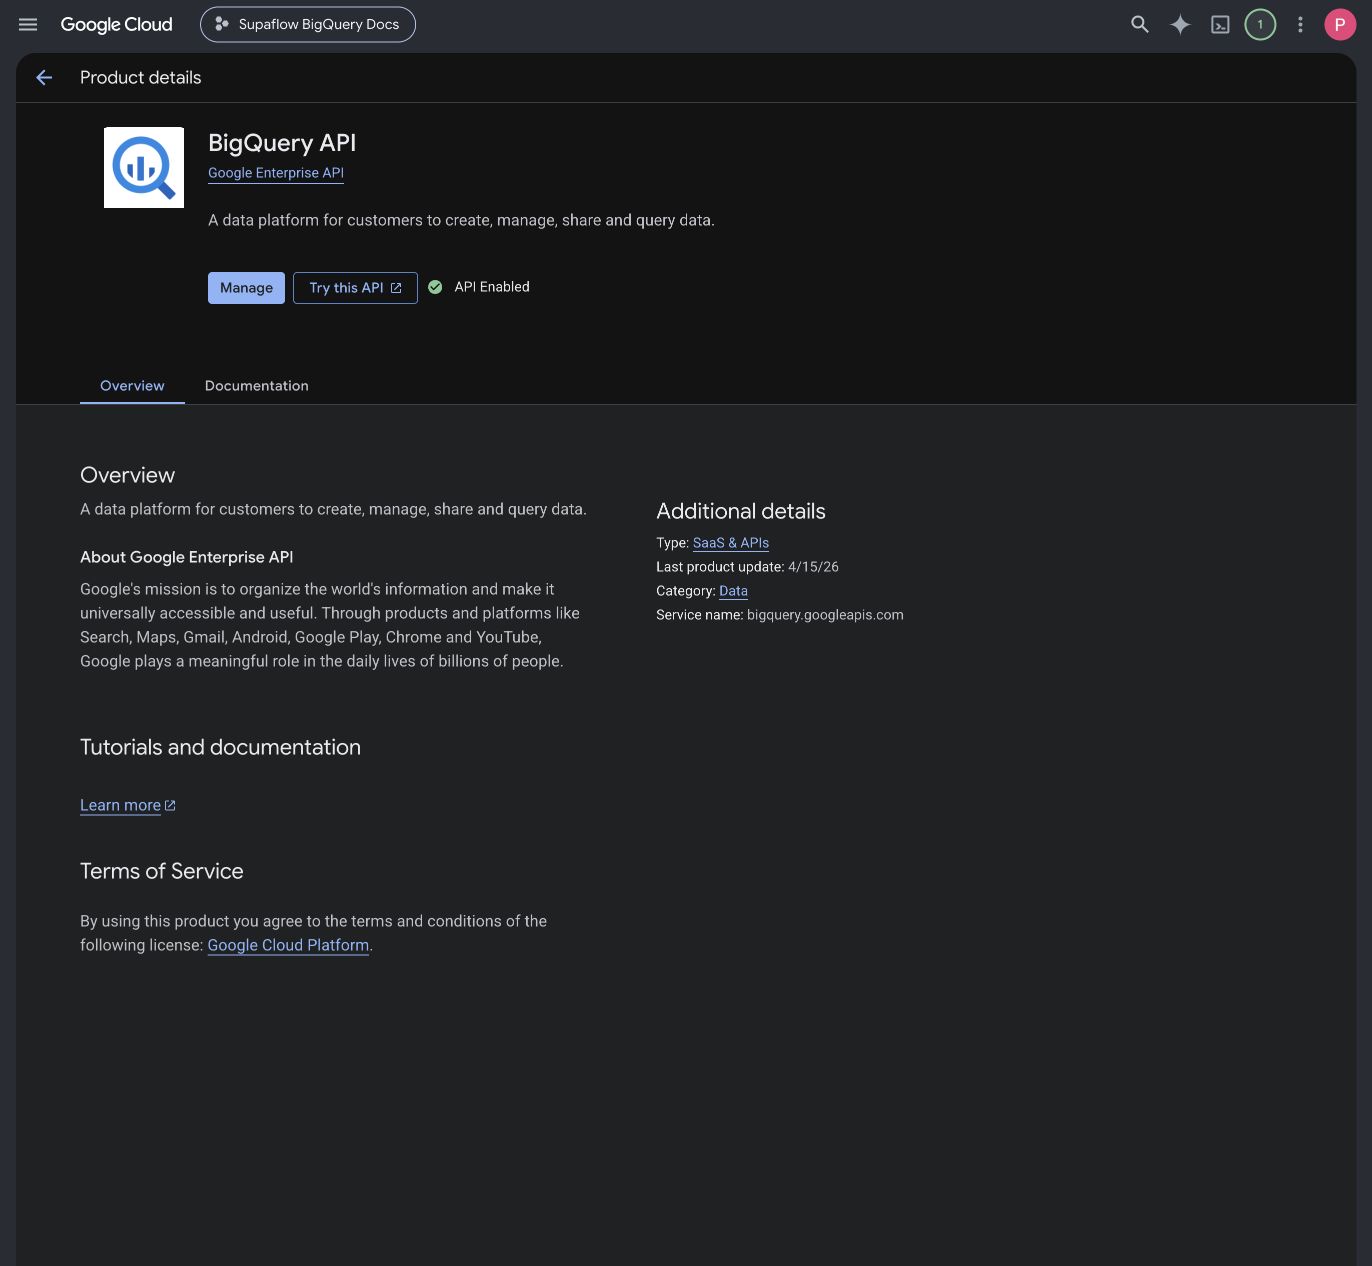
- Go to APIs & Services > Library.
- Search for BigQuery API.
- Open BigQuery API and click Enable.
- Confirm the page shows API enabled.
3. Enable the Cloud Storage API
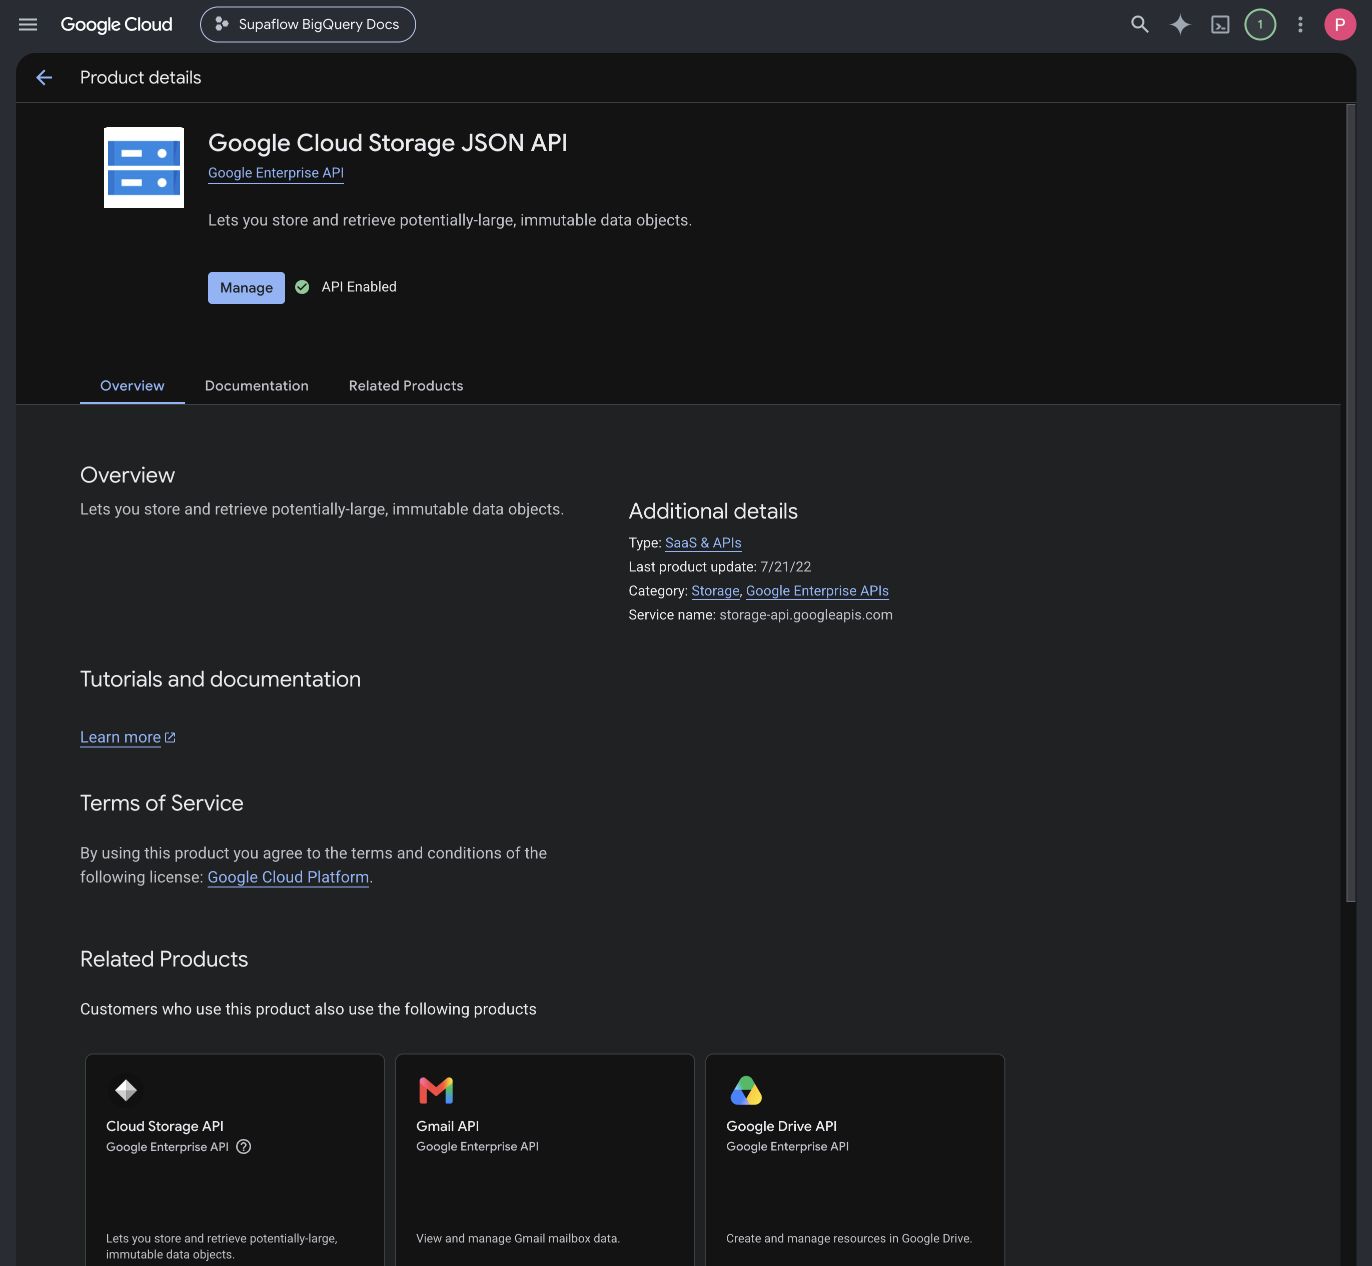
- Return to APIs & Services > Library.
- Search for Cloud Storage API.
- Open Cloud Storage API and click Enable.
- Confirm the page shows API enabled.
4. Create the default dataset
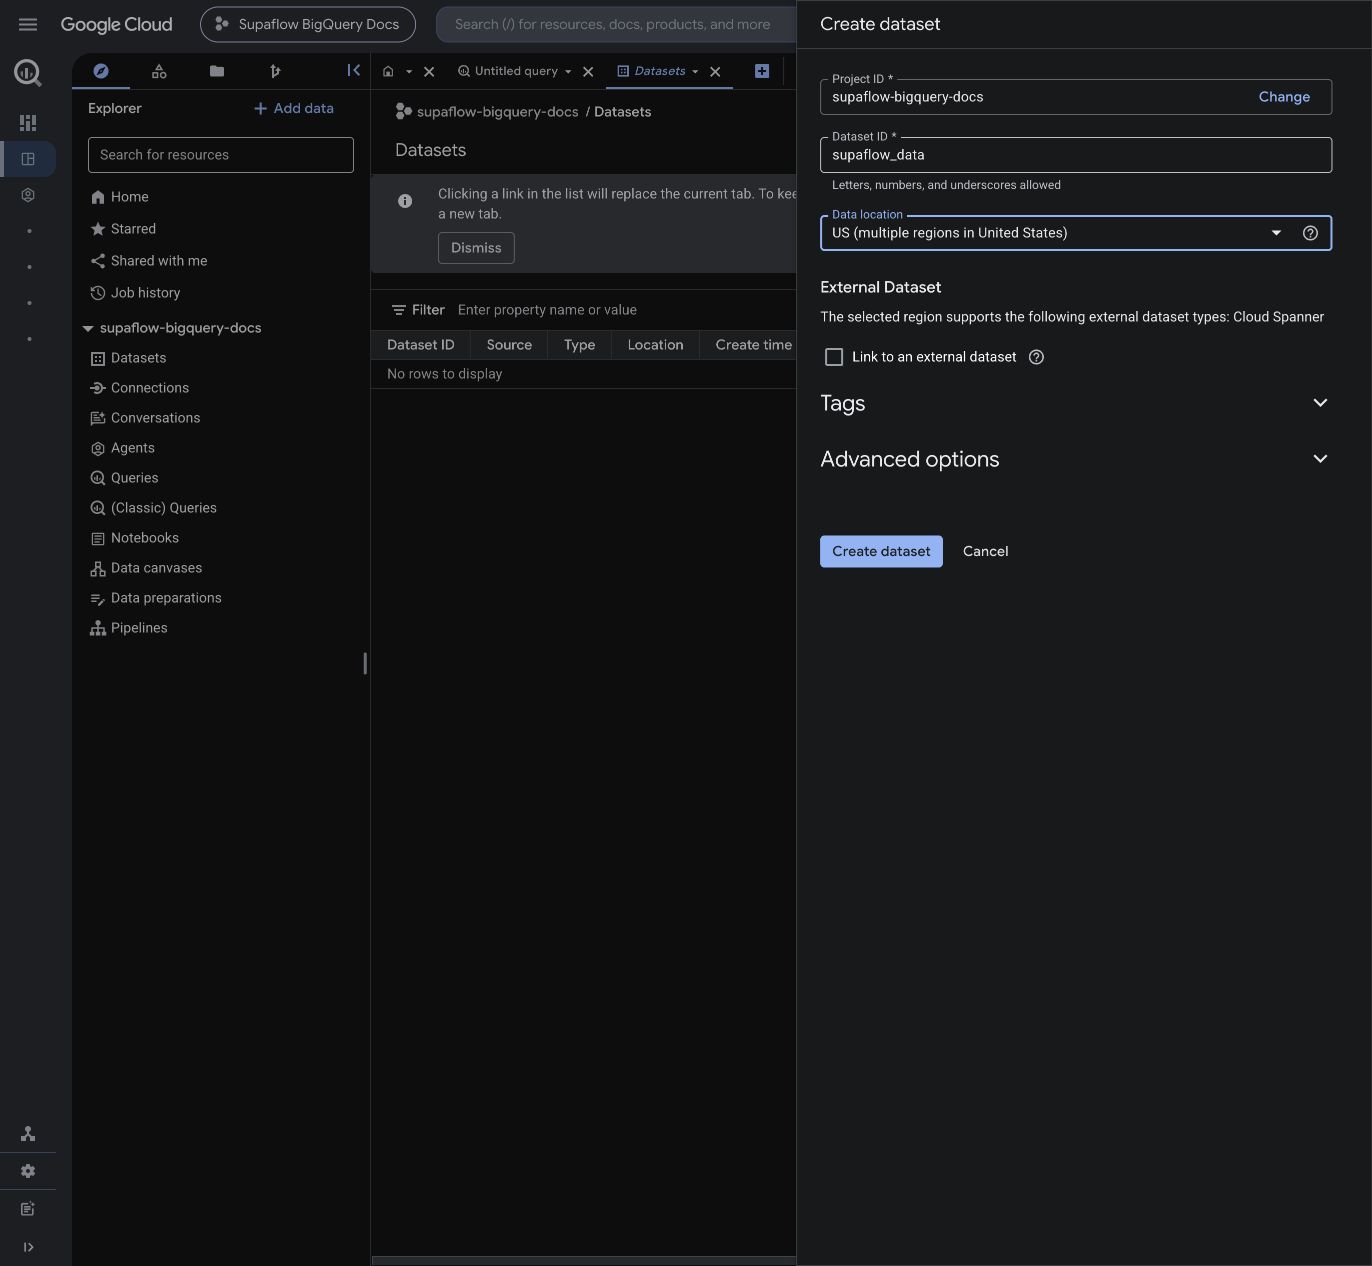
- Go to BigQuery > Studio.
- In Explorer, select the project and click Create dataset.
- Enter the Dataset ID, such as
supaflow_data. - For Location type, choose the location required by your organization. This guide uses US (multiple regions in United States).
- Keep Google-managed encryption unless your organization requires a customer-managed key.
- Click Create dataset.
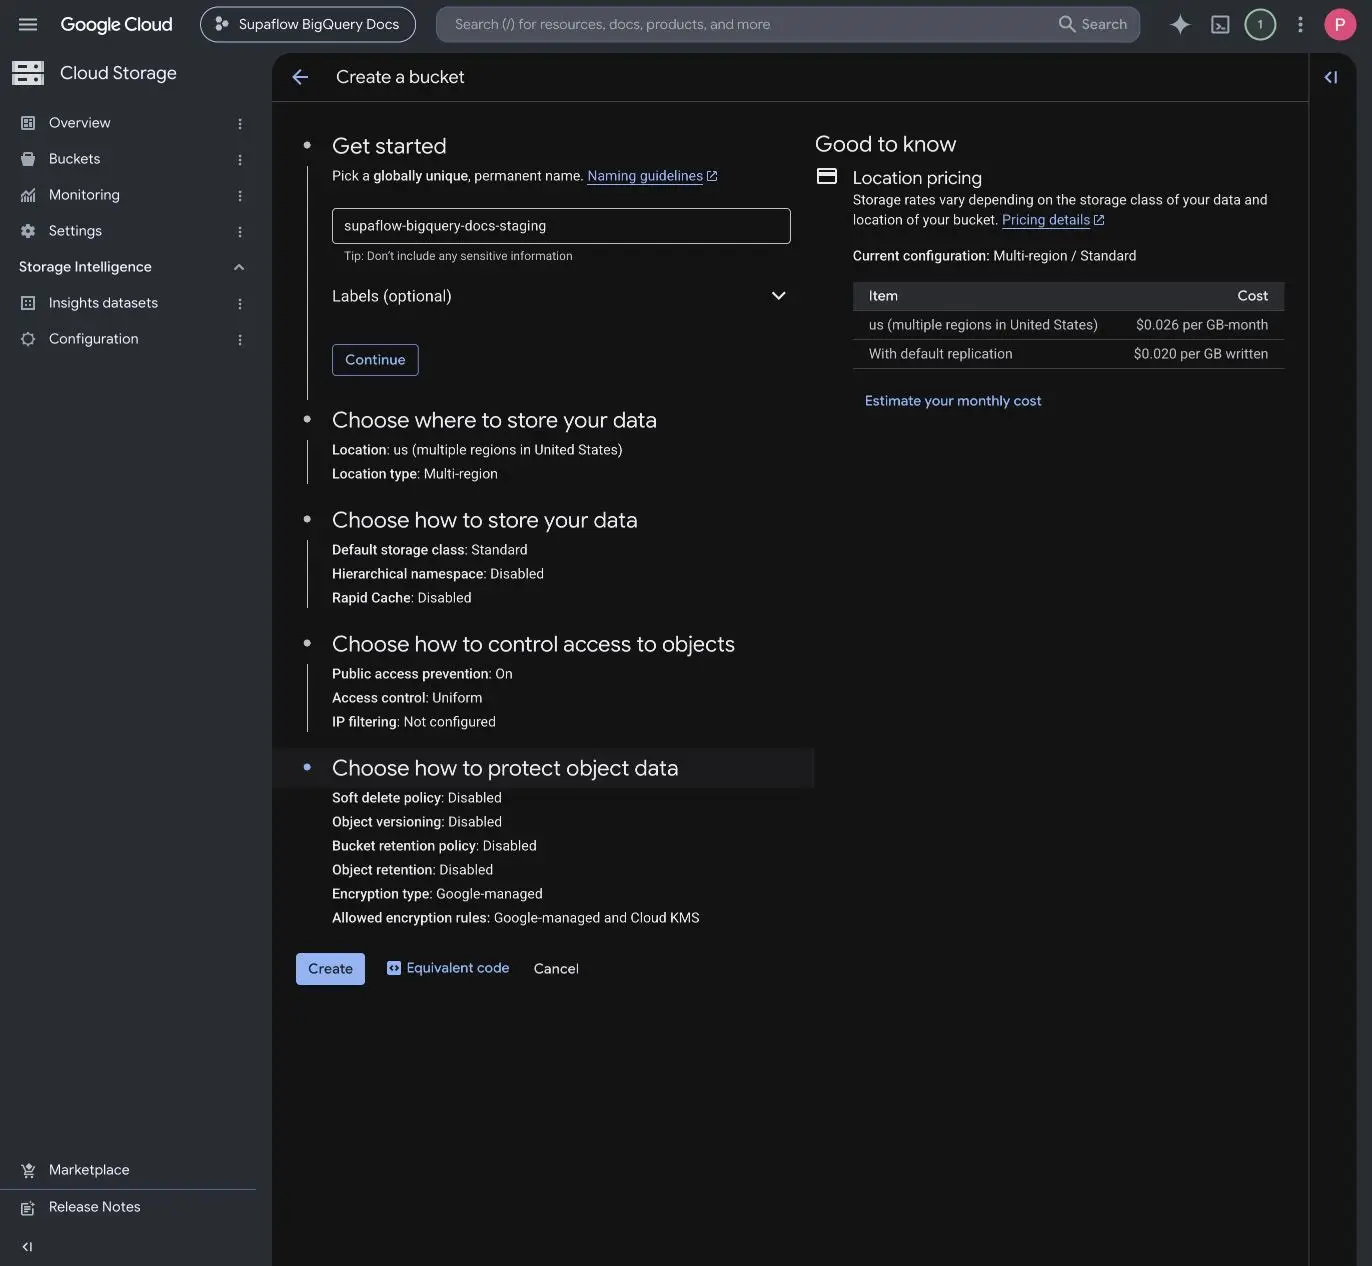
5. Create the staging bucket
- Go to Cloud Storage > Buckets and click Create.
- Enter a globally unique bucket name. Do not include
gs://. - Select the same location as the BigQuery dataset.
- Choose Standard as the default storage class.
- Select Uniform access control and keep Public access prevention enabled.
- Review your organization's protection requirements. The validated setup shown here disables soft delete and object versioning because the bucket contains short-lived staging data. If your policy requires either control, account for its retention and cost implications.
- Keep Google-managed encryption unless your organization requires CMEK, then click Create.
6. Add a staging cleanup rule
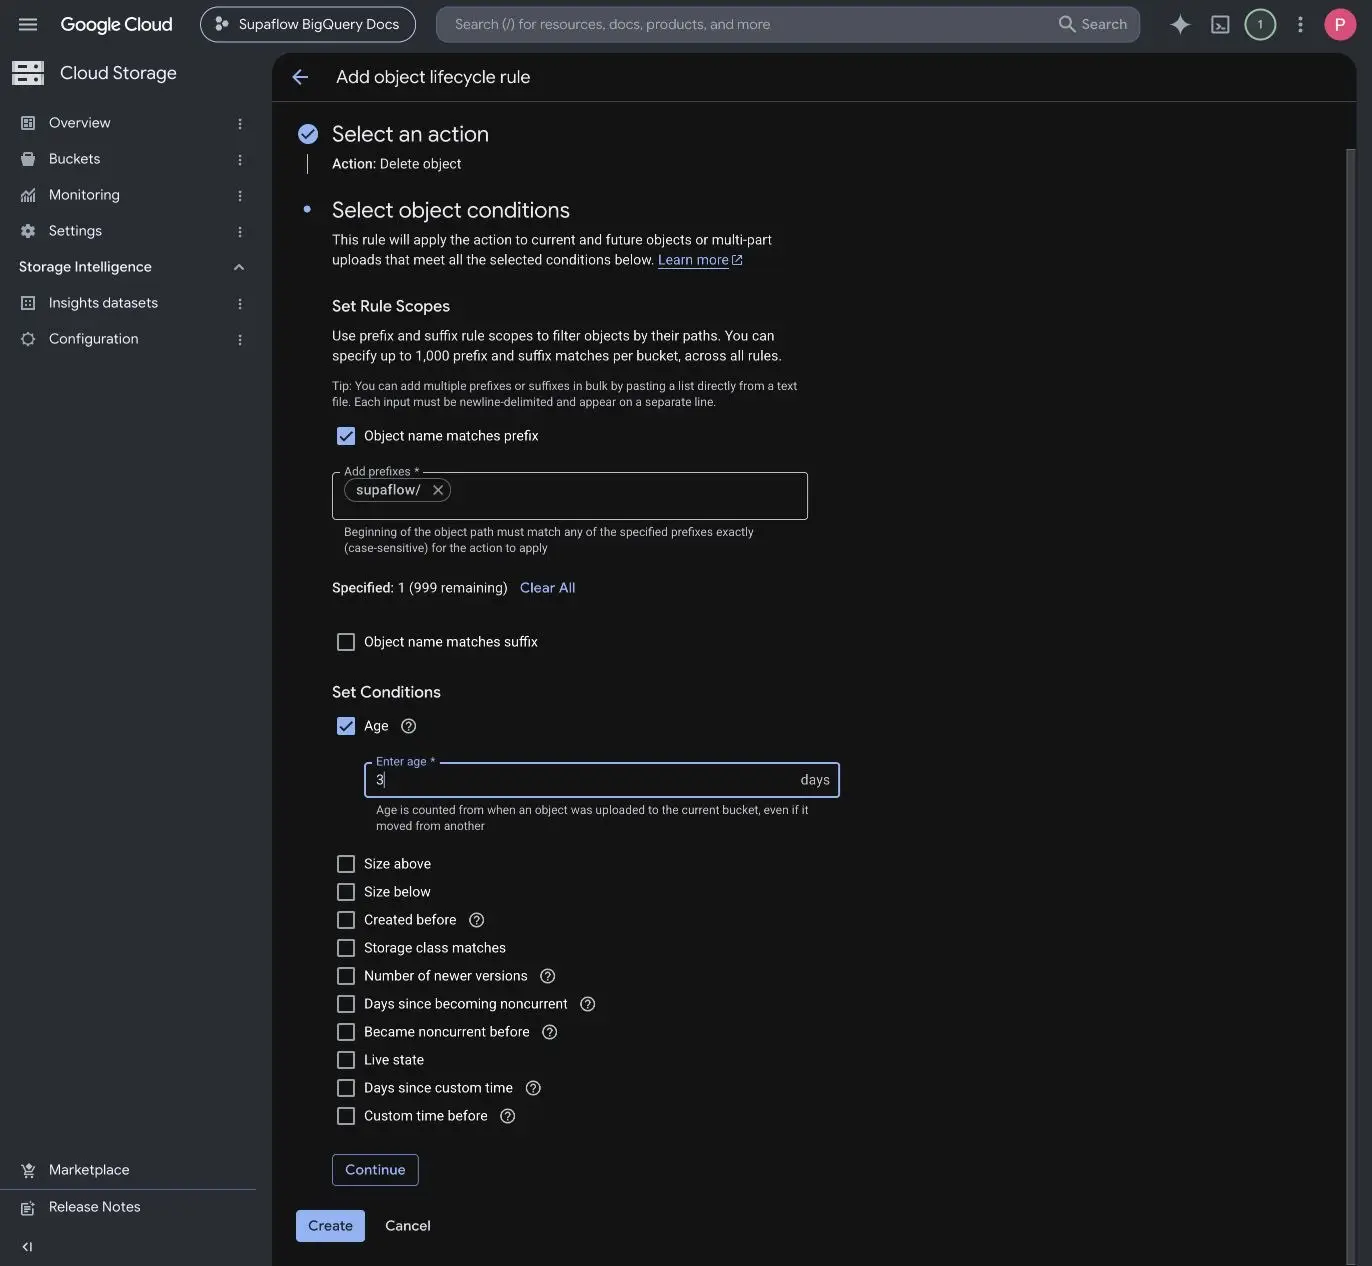
Successful loads remove their staged objects. A lifecycle rule is a backstop for interrupted or failed jobs.
- Open the bucket and select the Lifecycle tab.
- Click Add a rule.
- Choose Delete object and click Continue.
- Select Object name matches prefix and enter
supaflow/. - Select Age and enter
3days. - Click Create.
The trailing slash matters: it scopes deletion to objects below the Supaflow staging prefix instead of similarly named objects elsewhere in the bucket.
7. Start the destination and copy its identity
- In Supaflow, go to Destinations and click Create Destination.
- Select Google BigQuery.
- Enter a destination name and leave Authentication Method set to Managed service account.
- Copy the generated Service account email. It is an identity, not a private key.
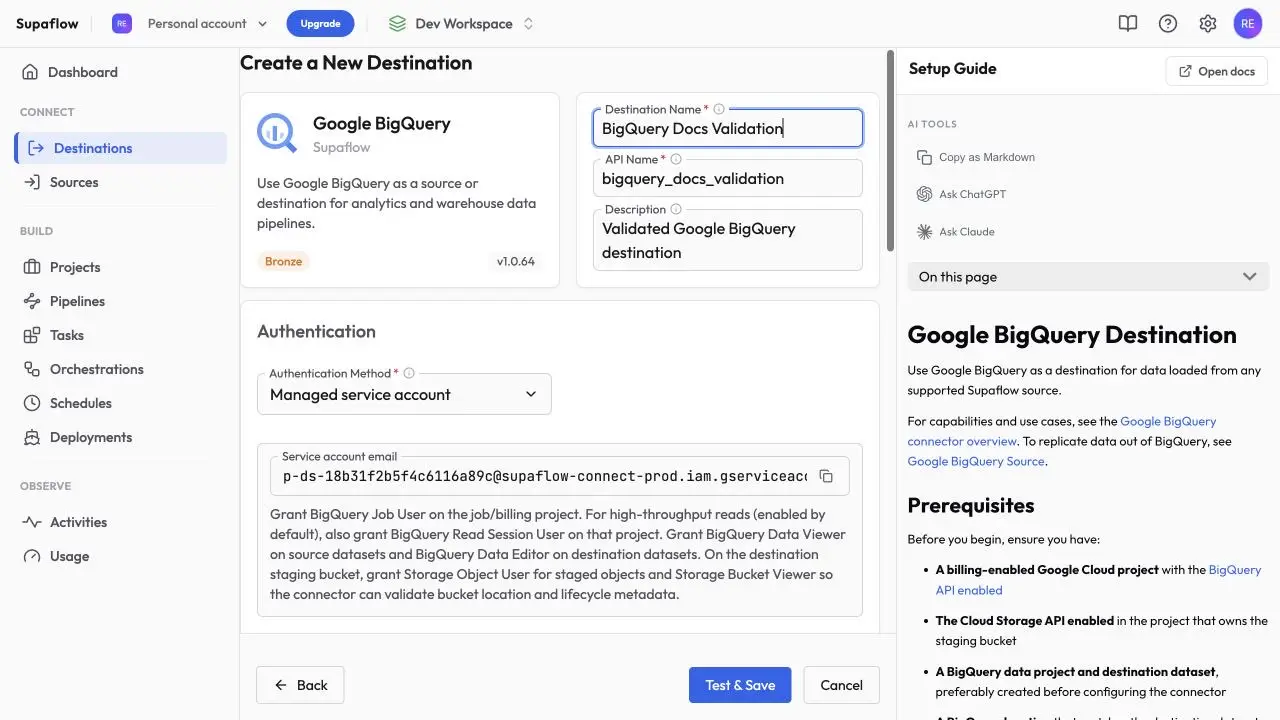
Do not create or download a Google Cloud service-account key for this path. Supaflow manages short-lived credentials for the generated identity.
8. Grant project-level BigQuery access
Choose the matching assignment before granting access:
| Supaflow configuration | Project ID grant | Billing Project ID grant |
|---|---|---|
| Billing Project ID is blank | BigQuery Data Editor and BigQuery Job User | None |
| Billing Project ID is set | BigQuery Data Editor | BigQuery Job User |
- In Google Cloud, go to IAM & Admin > IAM in the BigQuery data project entered as Project ID in Supaflow.
- Click Grant access and paste the generated Supaflow service-account email into New principals.
- Add BigQuery Data Editor (
roles/bigquery.dataEditor). - If Billing Project ID is blank, also add BigQuery Job User (
roles/bigquery.jobUser) and click Save. - If Billing Project ID is set, click Save with only BigQuery Data Editor. Switch to the billing project, click Grant access, add the same service-account email, grant BigQuery Job User, and click Save.
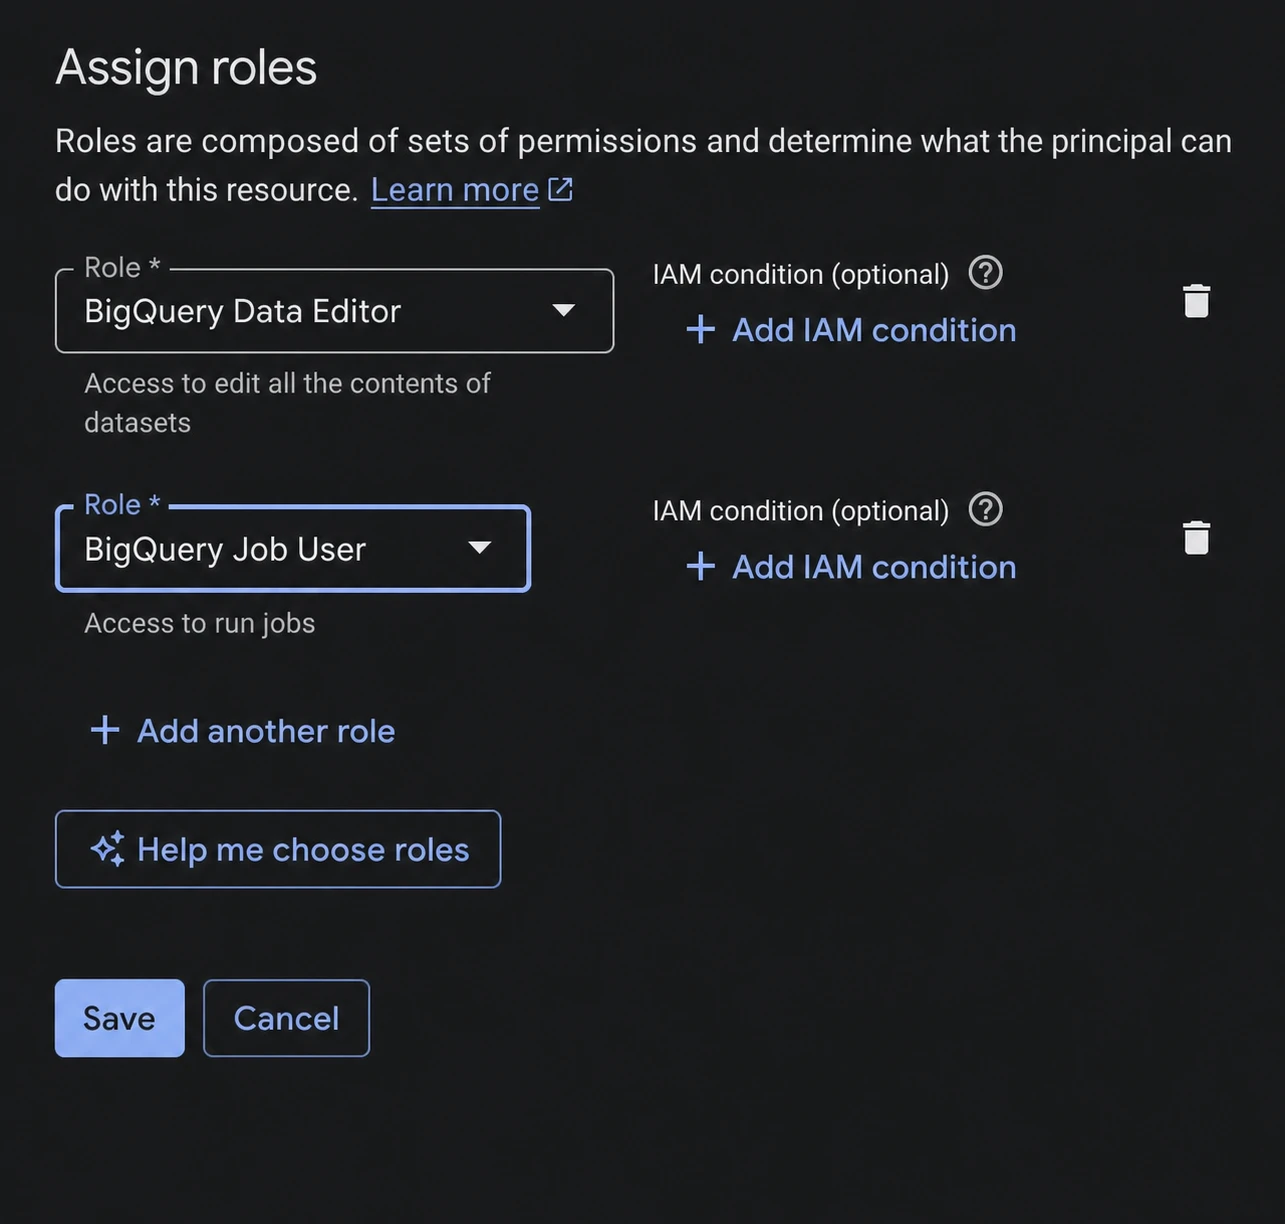
BigQuery Data Editor at project scope allows Supaflow to create and manage the datasets needed by future pipelines. BigQuery Job User allows it to create load and query jobs. The dataset-creation permission alone is not sufficient because destination loads also create, update, and load tables.
Because BigQuery Data Editor applies across the data project, use a dedicated project when you need to isolate Supaflow-managed data from other BigQuery workloads.
9. Optional: restrict writes to the default dataset
Use this alternative only when your organization cannot grant project-scoped BigQuery Data Editor:
- Go to BigQuery > Studio and open the default dataset created in step 4.
- Click Share > Manage permissions.
- Click Add principal and paste the generated service-account email.
- Select BigQuery Data Editor (
roles/bigquery.dataEditor). - Click Save, then close the permissions panel.
- When creating every pipeline that uses this connection, set Destination Namespace Rules to Destination Defined.
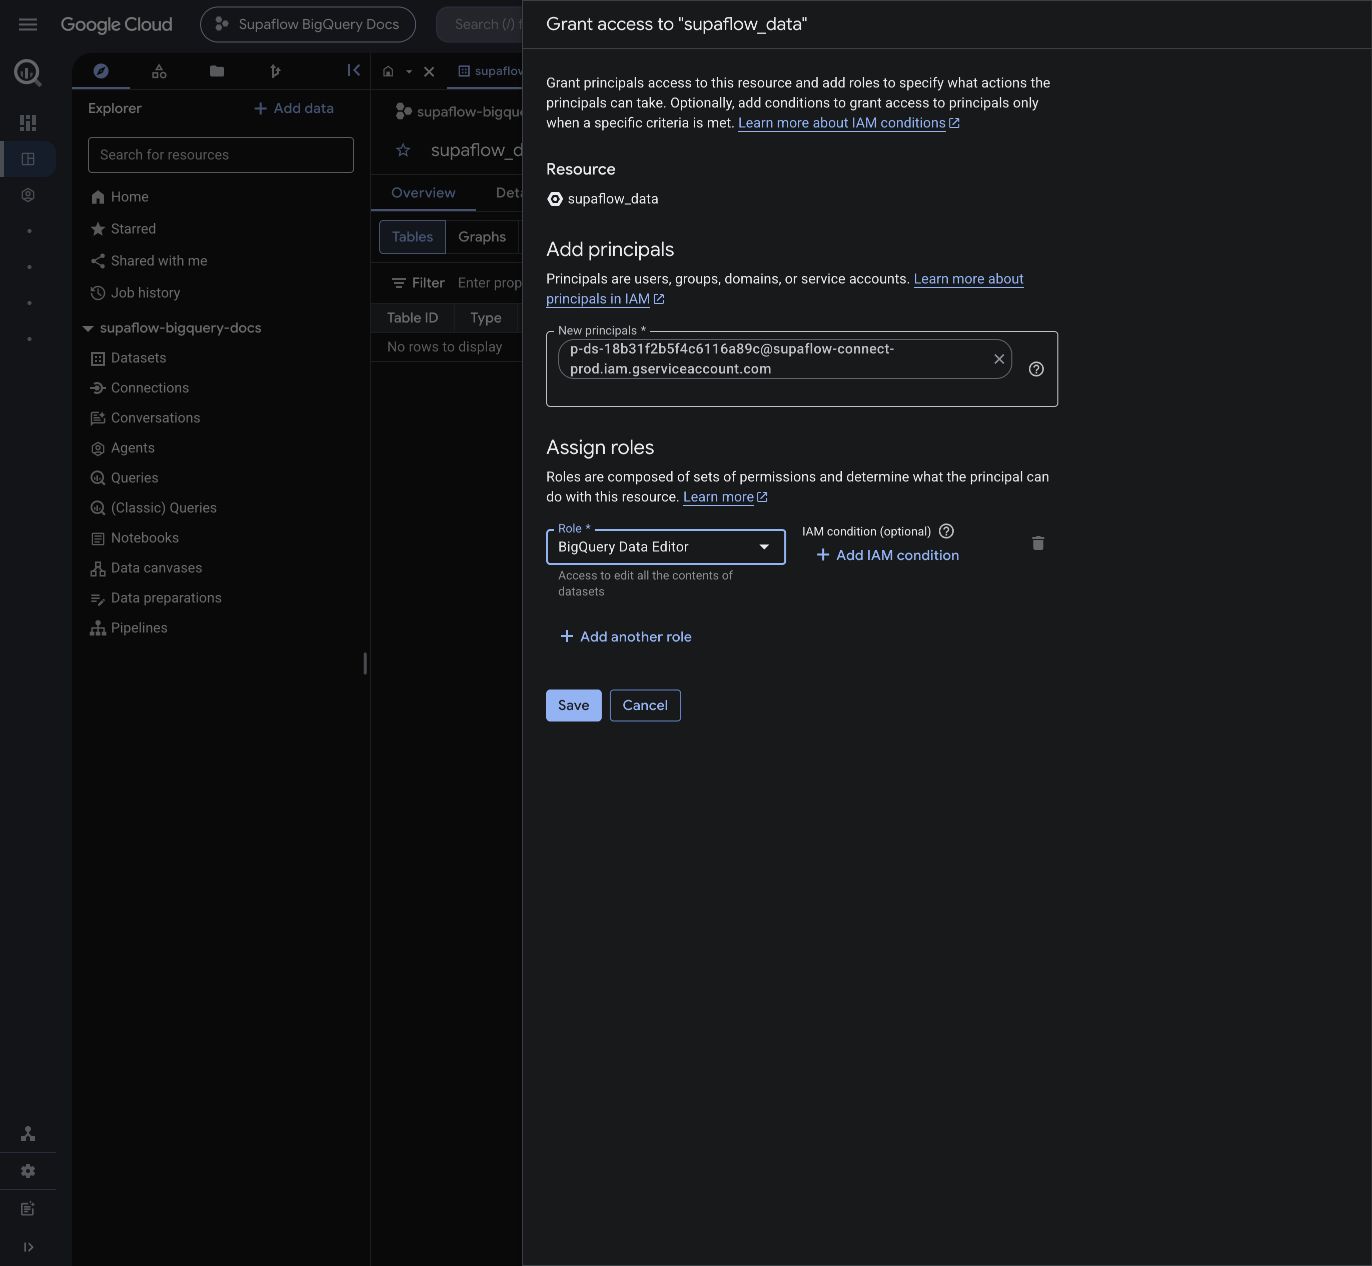
This restricted setup keeps all pipeline tables in Default Dataset. Do not combine dataset-scoped access with the default namespace rules: a later pipeline can target a new dataset such as salesforce_2 and fail because the service account cannot create it.
10. Grant staging-bucket access
- Go to Cloud Storage > Buckets and open the staging bucket.
- Select Permissions and click Grant access.
- Paste the generated service-account email.
- Add both roles:
- Storage Object User (
roles/storage.objectUser) - Storage Bucket Viewer (
roles/storage.bucketViewer)
- Storage Object User (
- Click Save.
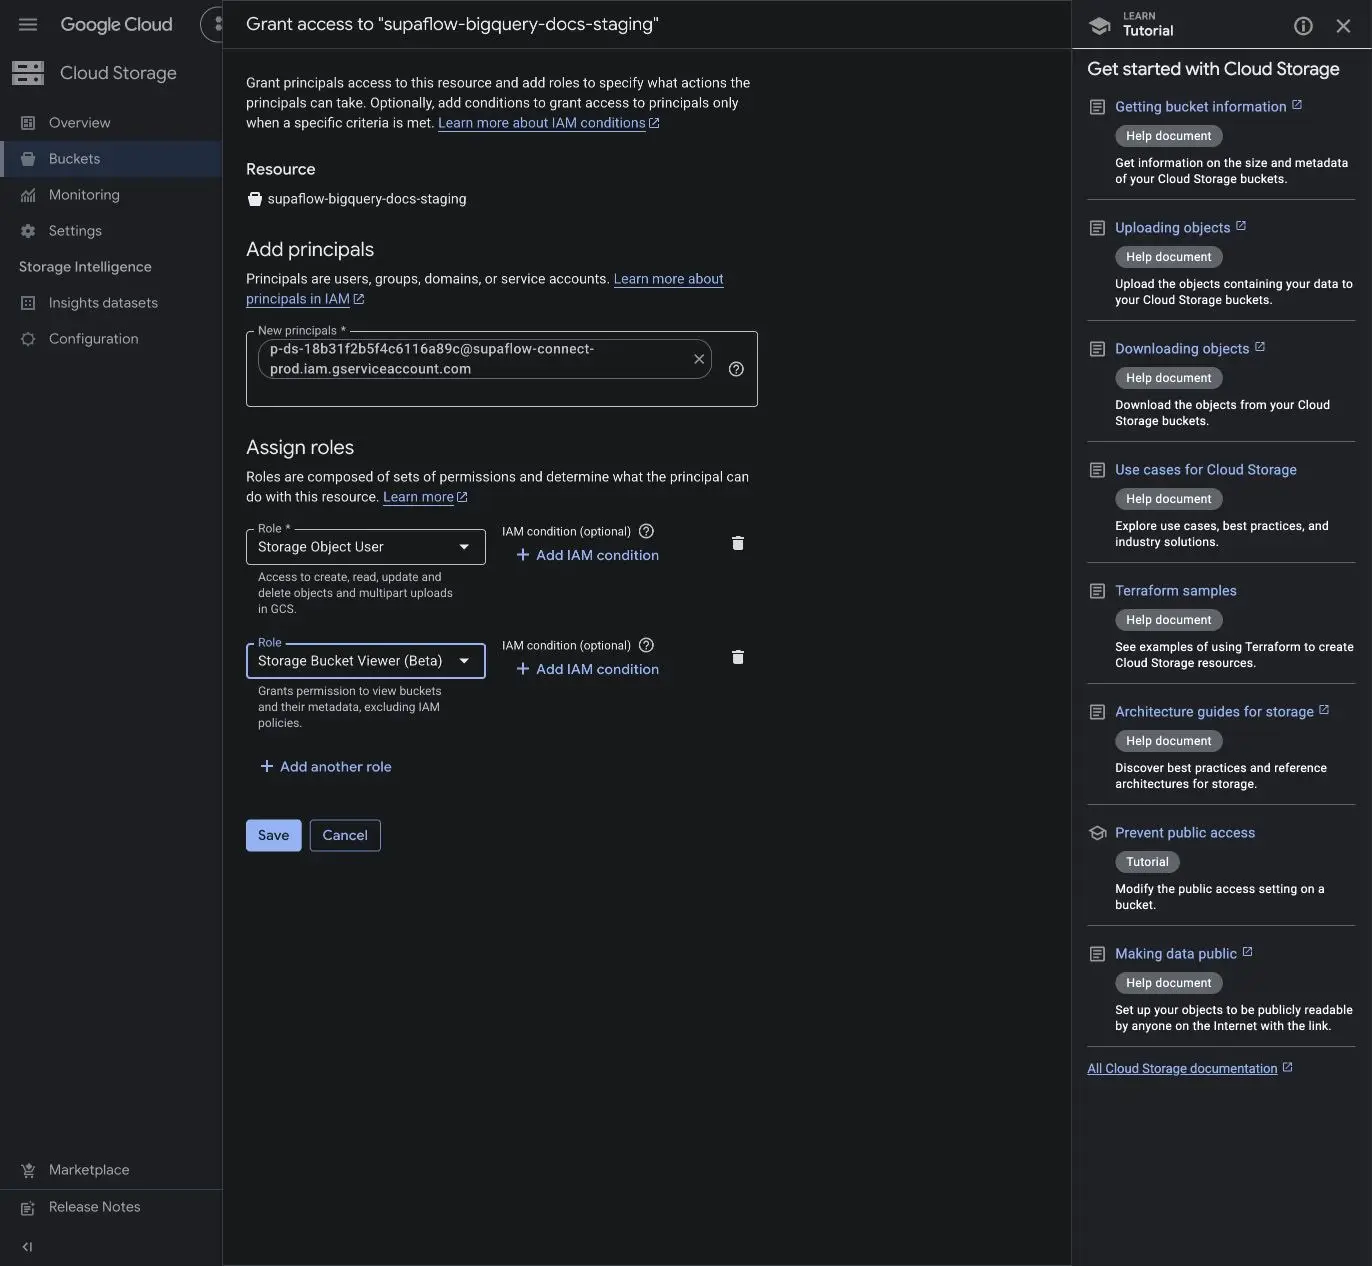
Storage Object User lets Supaflow manage staged objects. Storage Bucket Viewer supplies storage.buckets.get, which Supaflow uses to validate the bucket's existence, location, and lifecycle metadata.
11. Complete and validate the Supaflow destination
Return to the destination form and enter:
| Supaflow field | Value |
|---|---|
| Project ID | The Google Cloud project containing the destination dataset |
| Billing Project ID | Leave blank when it is the same as Project ID |
| Default Dataset | The fallback dataset ID, such as supaflow_data; it receives tables when a pipeline uses Destination Defined namespace rules |
| Location | The exact dataset and bucket location, such as US |
| Enable Source Schema Discovery | Disabled for a destination-only connection |
| GCS Staging Bucket | Bucket name only, without gs:// |
| GCS Staging Prefix | supaflow |
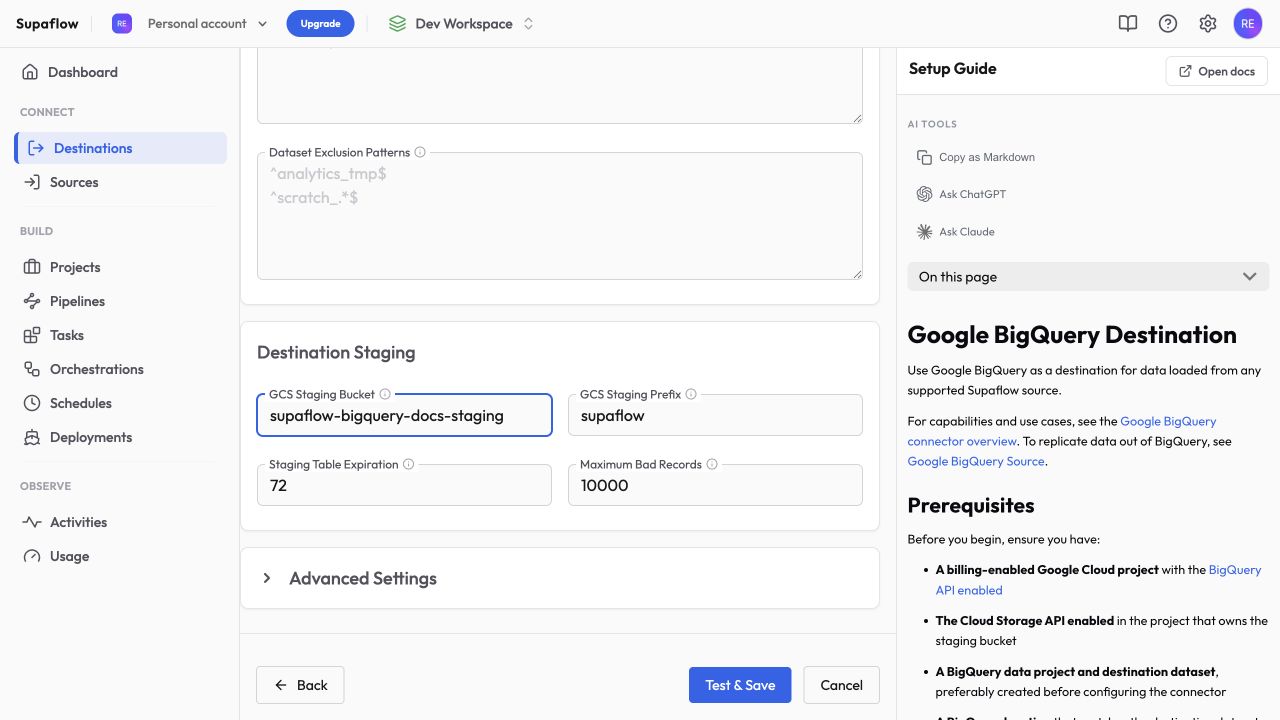
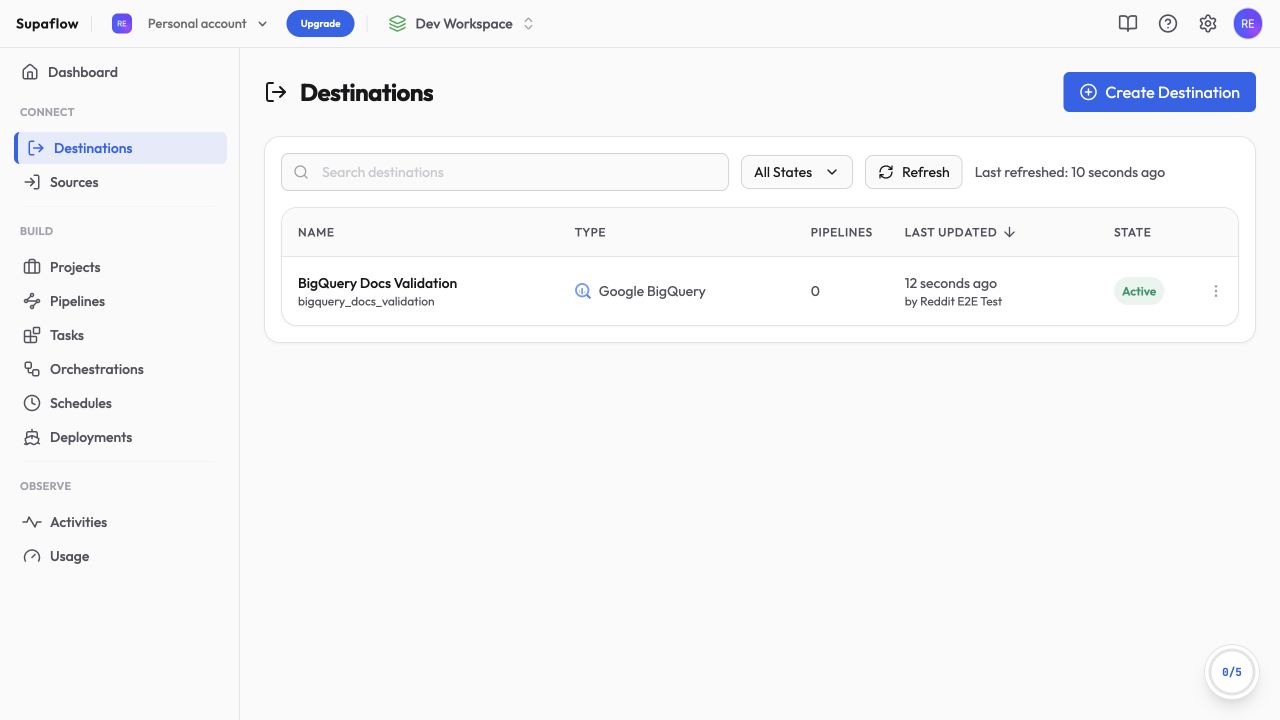
Click Test & Save. A successful connection test verifies authentication, job creation, default-dataset metadata access, and the staging bucket's existence and location. It does not create a future pipeline's dataset, upload a staging object, or write a destination table. Supaflow then returns to the destination list; the new connection can briefly show Syncing Schema while its initial post-save work completes.
CLI Handoff
The following commands provide the same setup for macOS, Linux, or Google Cloud Shell. Run them as an administrator with permission to create projects, link billing, create resources, and update IAM.
1. Set customer-specific values
export PROJECT_ID="acme-bigquery-production"
export PROJECT_NAME="Acme BigQuery Production"
export BILLING_ACCOUNT_ID="000000-000000-000000"
export BILLING_PROJECT_ID=""
export ORGANIZATION_ID="123456789012"
export LOCATION="US"
export DATASET_ID="supaflow_data"
export BUCKET_NAME="${PROJECT_ID}-staging"
export STAGING_PREFIX="supaflow"
Replace every example value. Leave BILLING_PROJECT_ID blank when PROJECT_ID owns the BigQuery jobs. Otherwise, set it to the separate project entered as Billing Project ID in Supaflow. Billing account, billing project, and organization IDs are identifiers, not secrets, but they should still come from the customer's approved Google Cloud administrator.
2. Create the project and resources
gcloud projects create "$PROJECT_ID" \
  --name="$PROJECT_NAME" \
  --organization="$ORGANIZATION_ID"

gcloud billing projects link "$PROJECT_ID" \
  --billing-account="$BILLING_ACCOUNT_ID"

gcloud services enable \
  bigquery.googleapis.com \
  storage-api.googleapis.com \
  --project="$PROJECT_ID"

bq --project_id="$PROJECT_ID" mk \
  --dataset \
  --location="$LOCATION" \
  "$PROJECT_ID:$DATASET_ID"

gcloud storage buckets create "gs://$BUCKET_NAME" \
  --project="$PROJECT_ID" \
  --location="$LOCATION" \
  --default-storage-class=STANDARD \
  --uniform-bucket-level-access \
  --public-access-prevention \
  --soft-delete-duration=0s
If the project belongs under a folder, replace --organization="$ORGANIZATION_ID" with --folder="FOLDER_ID". If the account creates projects without an organization or folder, omit the parent flag.
3. Apply the lifecycle rule
Create supaflow-lifecycle.json:
{
  "rule": [
    {
      "action": {
        "type": "Delete"
      },
      "condition": {
        "age": 3,
        "matchesPrefix": [
          "supaflow/"
        ]
      }
    }
  ]
}
Apply it to the bucket:
gcloud storage buckets update "gs://$BUCKET_NAME" \
  --lifecycle-file=supaflow-lifecycle.json
If you change STAGING_PREFIX, update matchesPrefix to the same value with a trailing slash.
4. Generate the Supaflow identity
In Supaflow, start a Google BigQuery destination with Managed service account authentication and copy its generated service-account email. Then set it in the same shell:
export SUPAFLOW_SERVICE_ACCOUNT="service-account-from-supaflow@example.iam.gserviceaccount.com"
5. Apply least-privilege IAM
JOB_PROJECT_ID="${BILLING_PROJECT_ID:-$PROJECT_ID}"

gcloud projects add-iam-policy-binding "$JOB_PROJECT_ID" \
  --member="serviceAccount:$SUPAFLOW_SERVICE_ACCOUNT" \
  --role="roles/bigquery.jobUser"

gcloud projects add-iam-policy-binding "$PROJECT_ID" \
  --member="serviceAccount:$SUPAFLOW_SERVICE_ACCOUNT" \
  --role="roles/bigquery.dataEditor"

gcloud storage buckets add-iam-policy-binding "gs://$BUCKET_NAME" \
  --member="serviceAccount:$SUPAFLOW_SERVICE_ACCOUNT" \
  --role="roles/storage.objectUser"

gcloud storage buckets add-iam-policy-binding "gs://$BUCKET_NAME" \
  --member="serviceAccount:$SUPAFLOW_SERVICE_ACCOUNT" \
  --role="roles/storage.bucketViewer"
These commands implement the default per-pipeline dataset behavior. JOB_PROJECT_ID resolves to BILLING_PROJECT_ID when it is set and otherwise resolves to PROJECT_ID.
For the restricted dataset-scoped alternative, replace the project-level BigQuery Data Editor command above with this dataset-level grant:
bq query \
  --project_id="$PROJECT_ID" \
  --location="$LOCATION" \
  --use_legacy_sql=false \
  "GRANT \`roles/bigquery.dataEditor\` ON SCHEMA \`$PROJECT_ID.$DATASET_ID\` TO \"serviceAccount:$SUPAFLOW_SERVICE_ACCOUNT\""
Do not run both Data Editor commands. The dataset-level command replaces the gcloud projects add-iam-policy-binding ... roles/bigquery.dataEditor command, and every pipeline that uses the connection must use Destination Defined namespace rules as described in step 9.
6. Verify the handoff
gcloud services list \
  --enabled \
  --project="$PROJECT_ID" \
  --filter="name:(bigquery.googleapis.com OR storage-api.googleapis.com)"

bq show \
  --project_id="$PROJECT_ID" \
  --format=prettyjson \
  "$PROJECT_ID:$DATASET_ID"

gcloud storage buckets describe "gs://$BUCKET_NAME"

gcloud projects get-iam-policy "$PROJECT_ID" \
  --flatten="bindings[].members" \
  --filter="bindings.members:serviceAccount:$SUPAFLOW_SERVICE_ACCOUNT"

gcloud projects get-iam-policy "$JOB_PROJECT_ID" \
  --flatten="bindings[].members" \
  --filter="bindings.members:serviceAccount:$SUPAFLOW_SERVICE_ACCOUNT"

gcloud storage buckets get-iam-policy "gs://$BUCKET_NAME"
Complete the Supaflow fields from step 11, then click Test & Save. This validates the connection as the generated connector identity instead of the administrator who provisioned the resources. To validate the complete write path, run a small pipeline and confirm that Supaflow creates its pipeline dataset when needed and loads a destination table.
Cleanup and Ownership
The Google Cloud project, dataset, bucket, billing relationship, IAM policies, and lifecycle rules remain customer owned. Removing the Supaflow destination does not delete those resources. Follow the customer's retention and change-management procedures before deleting the project or removing the service-account grants.
For connector behavior, configuration fields, and troubleshooting, return to Google BigQuery Destination.
 Ask Claude